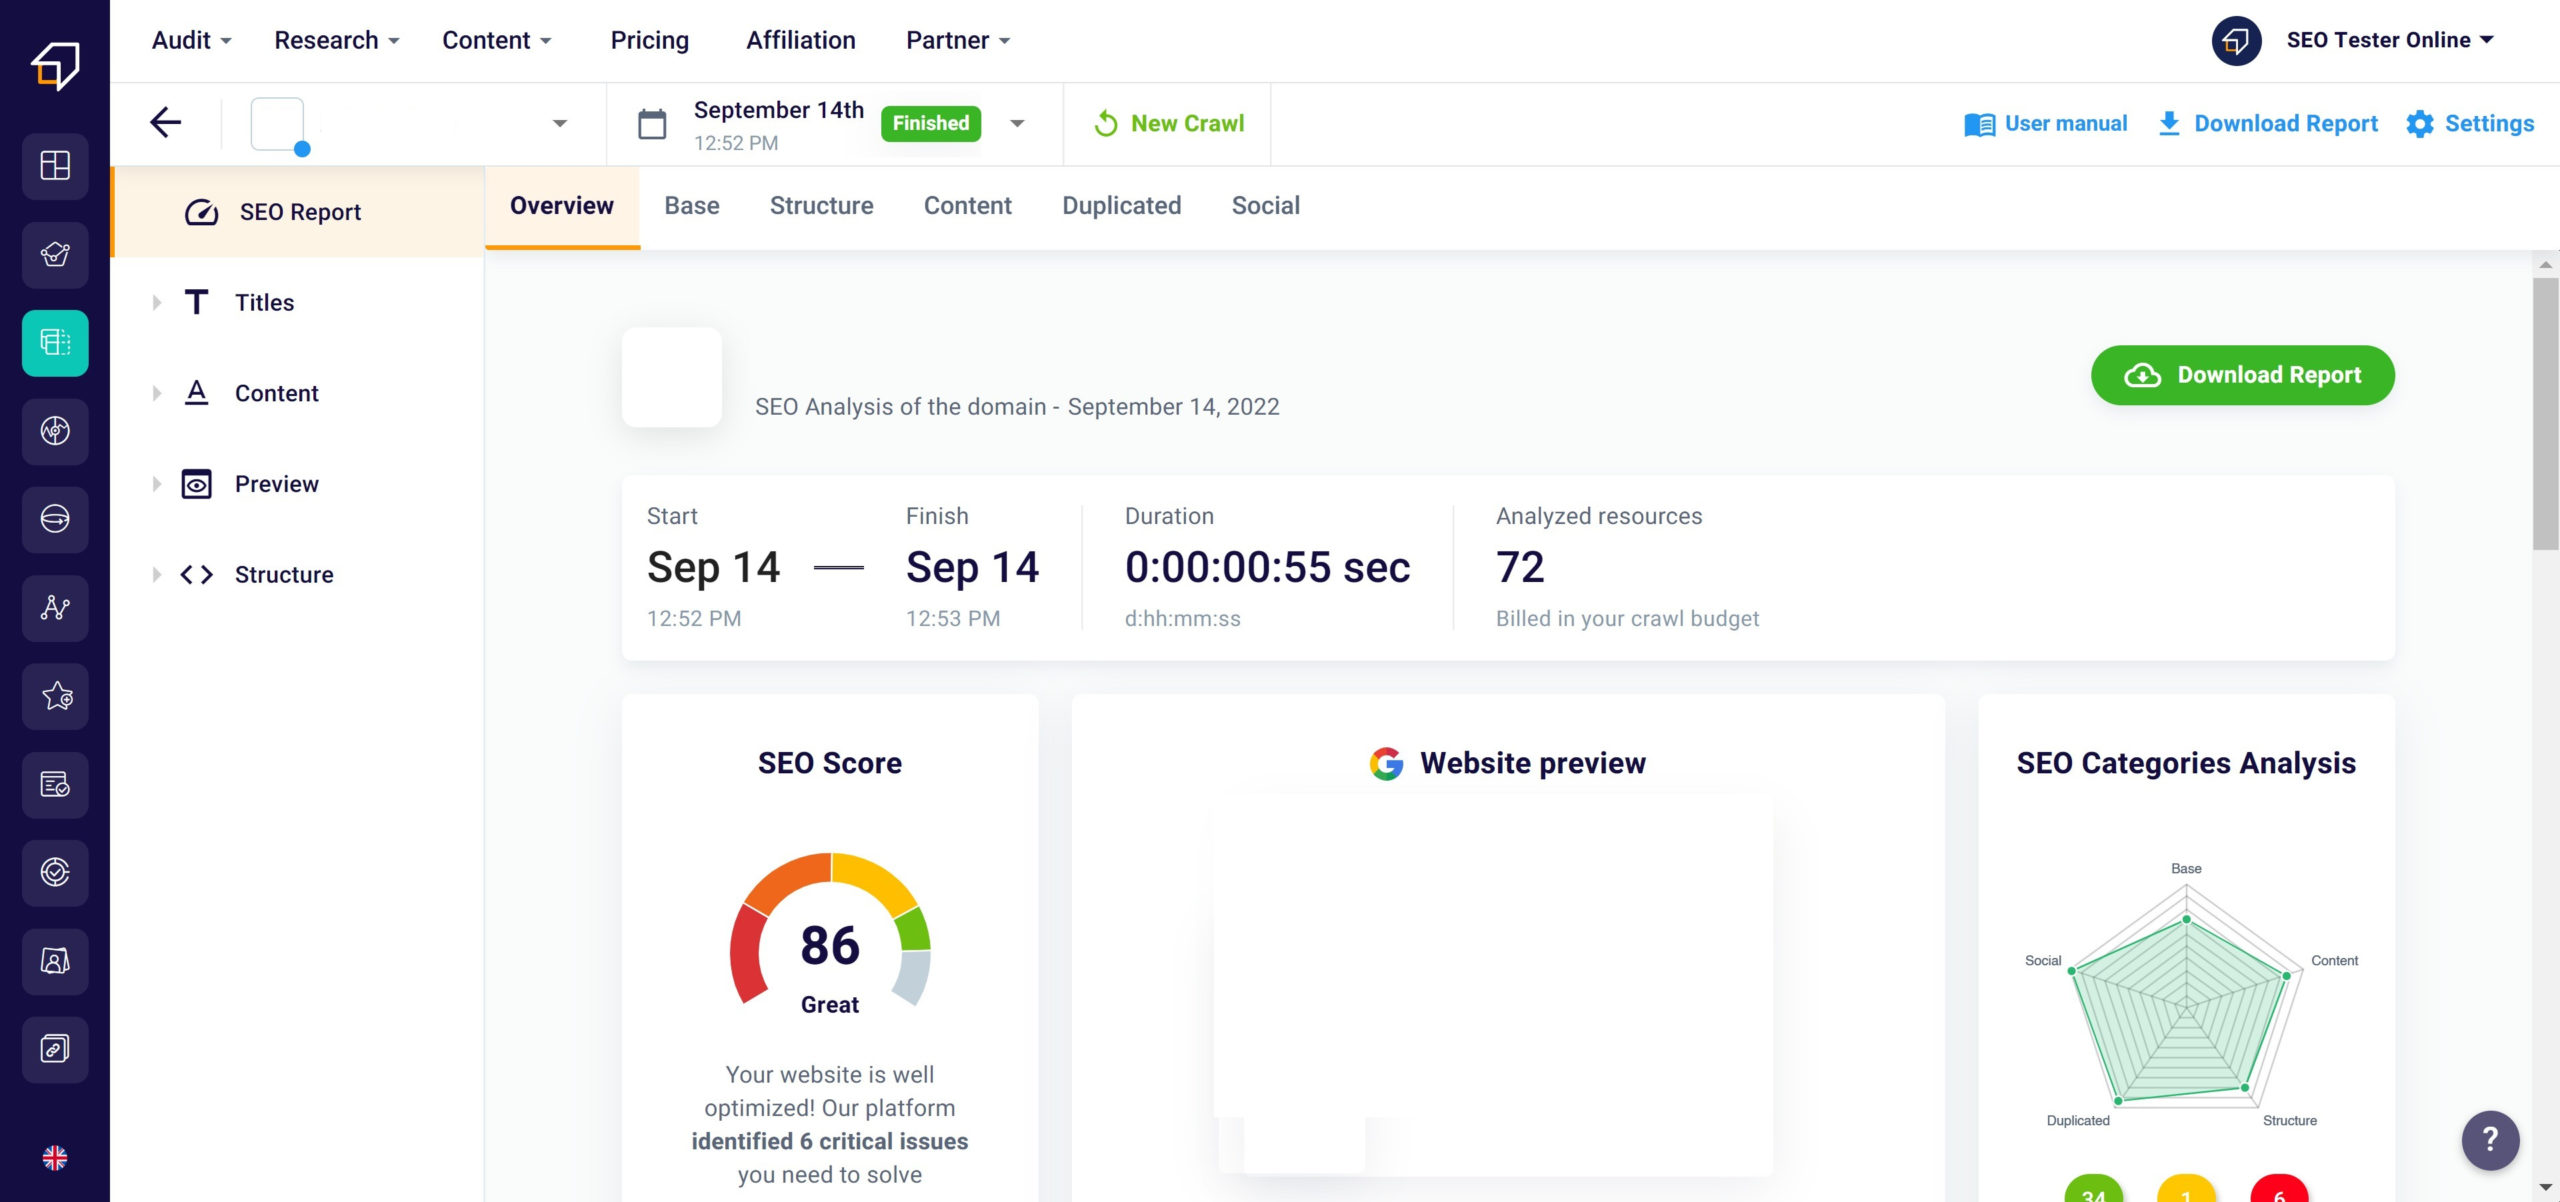

SERP Checker 360 ° Guide
SERP checker allows you to keep track of your competitors for a given keyword. With this tool, you can overview how the other websites are performing on the SERP for each query and why.
SERP Checker analyzes your competitors’ performances for what concerns the social signals, copywriting, and backlinks.
How to access SERP Checker 360°?
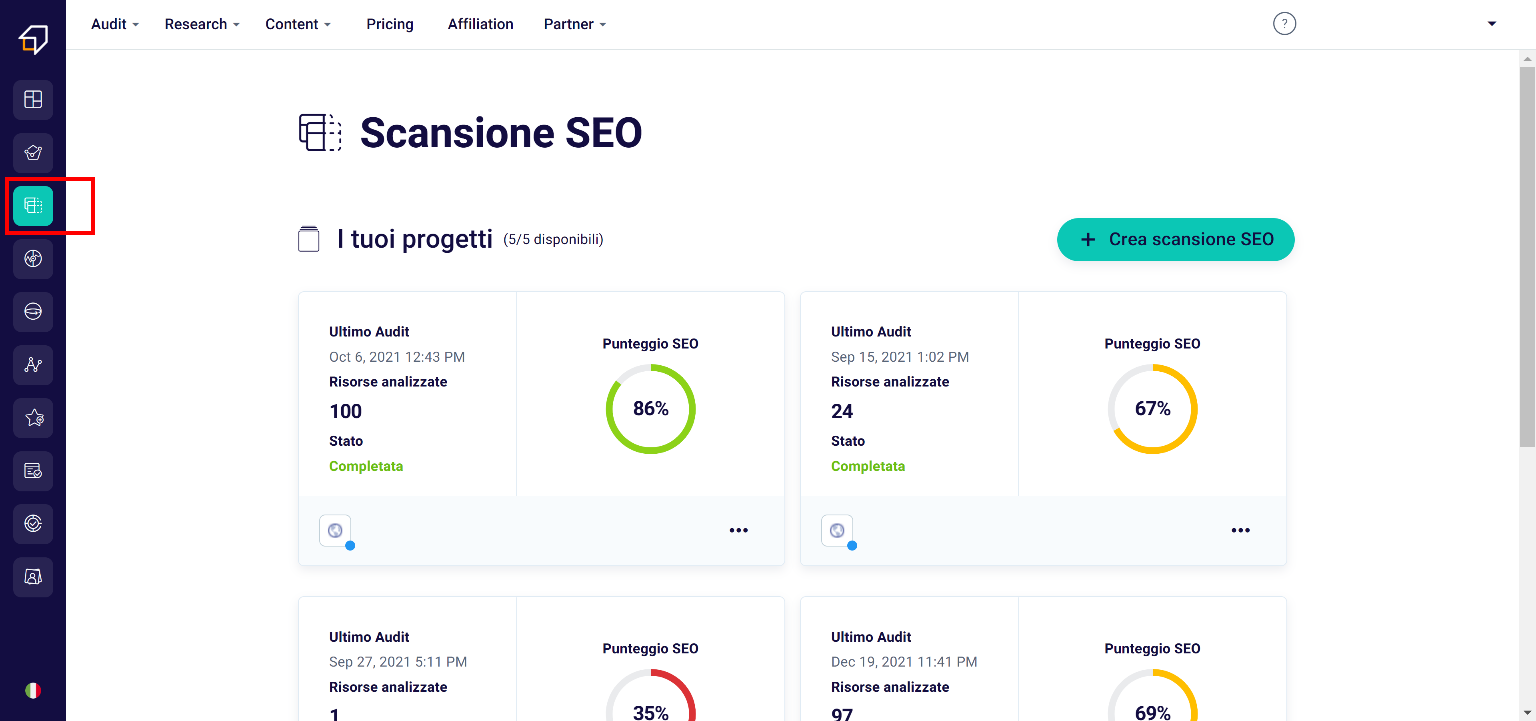
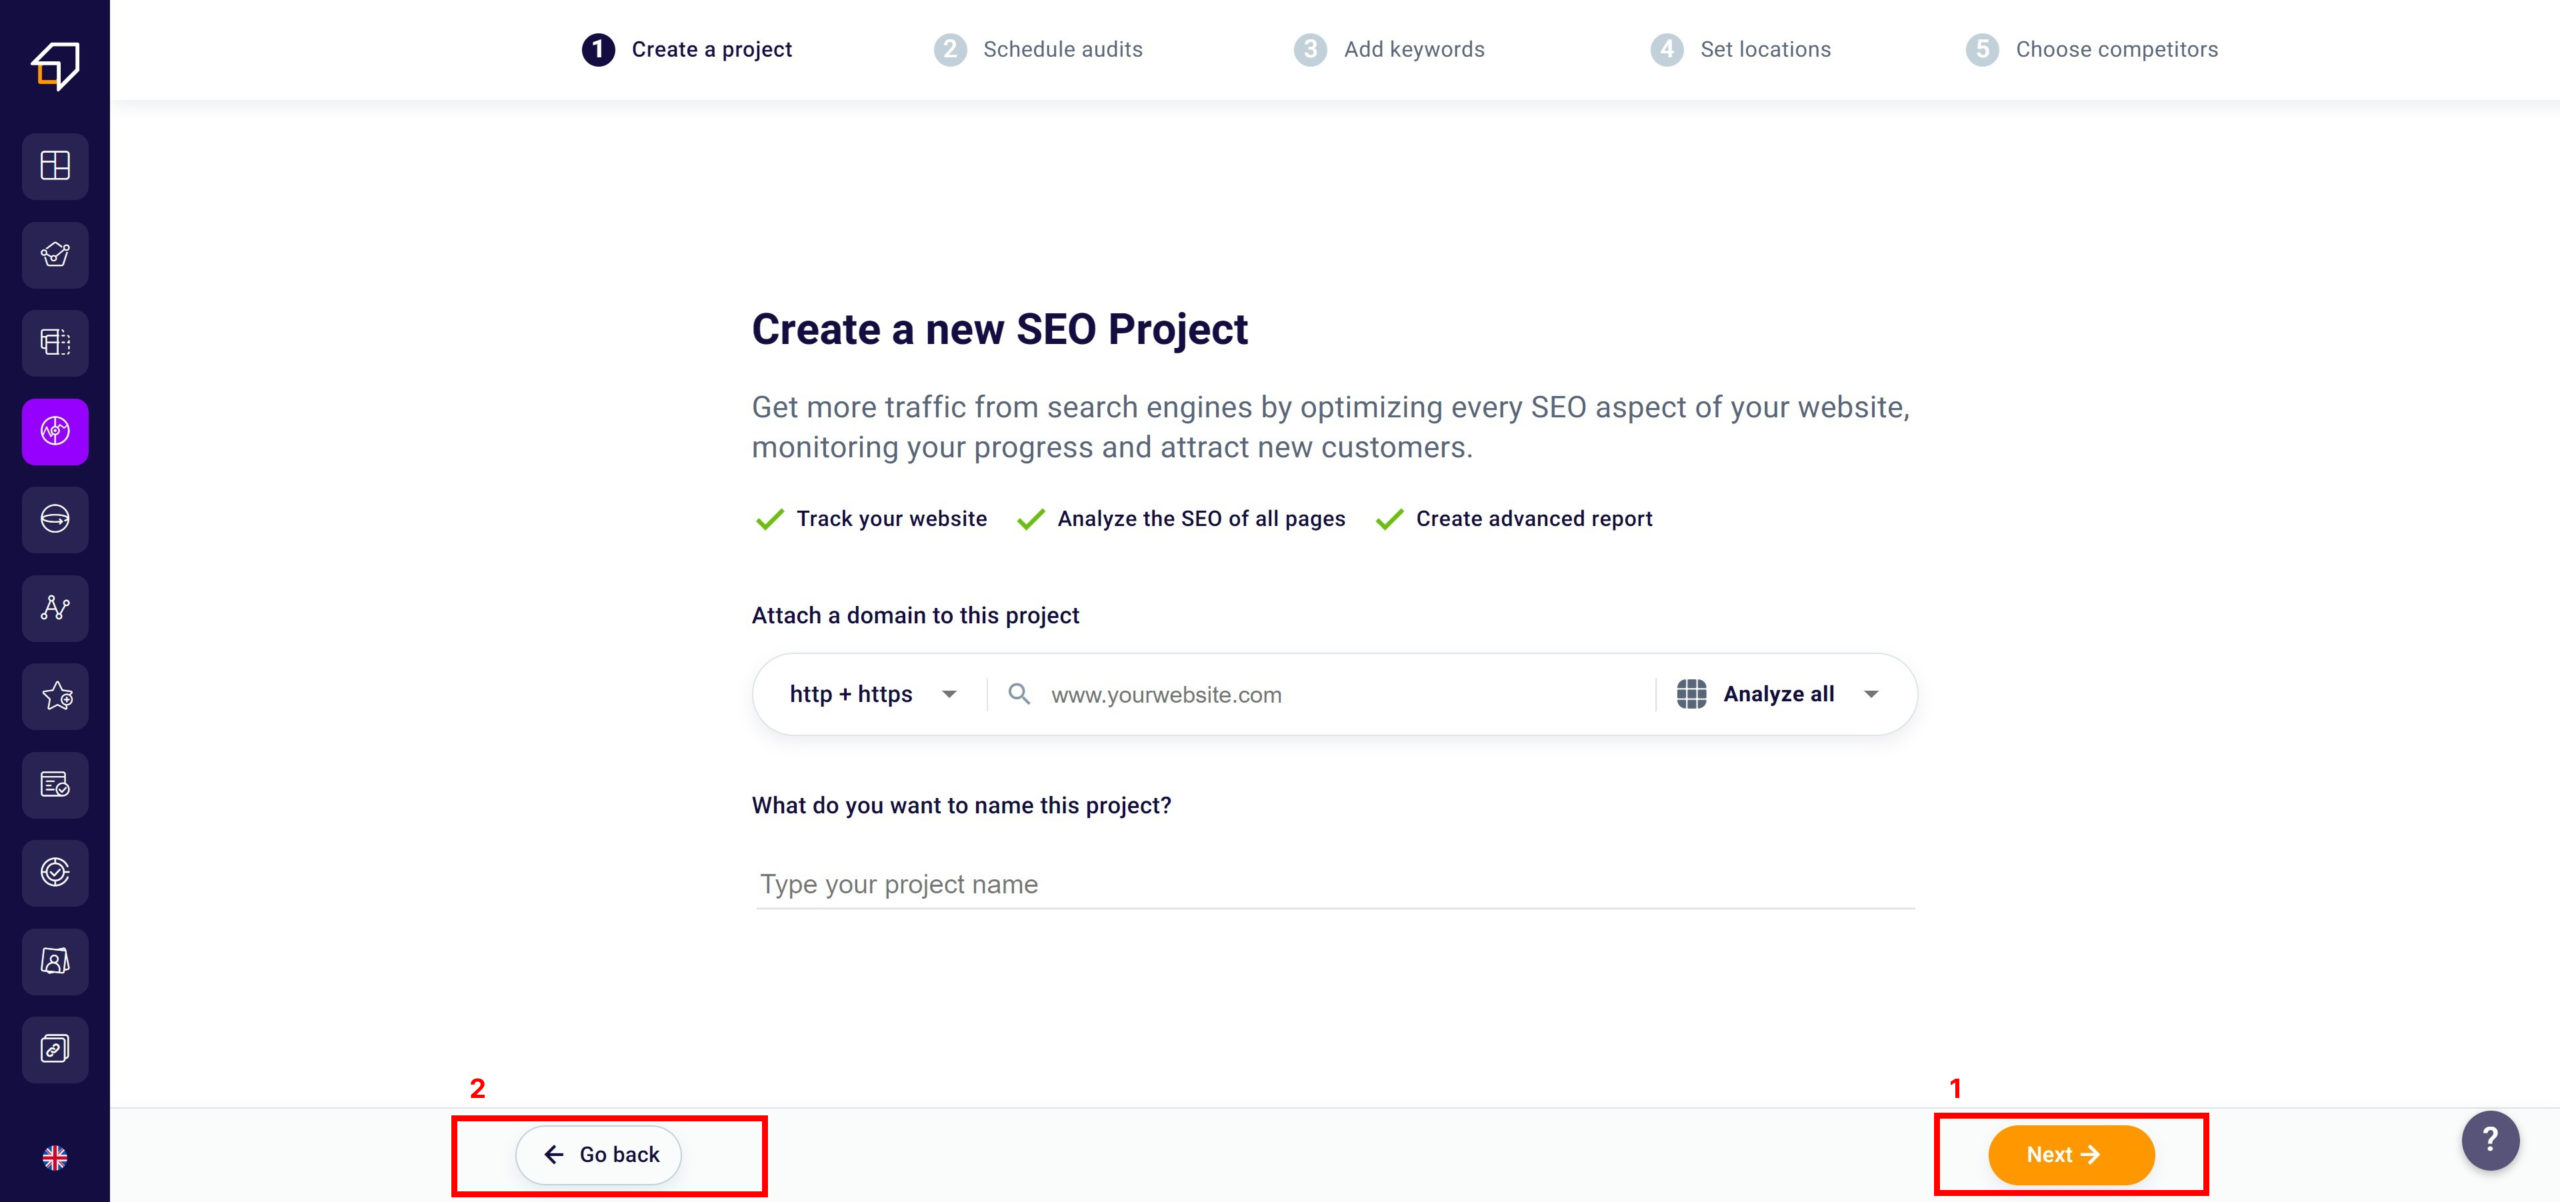
To enter our tool you can click here or click the respective icon in the side menu on the left.
How to use SERP Checker 360°?
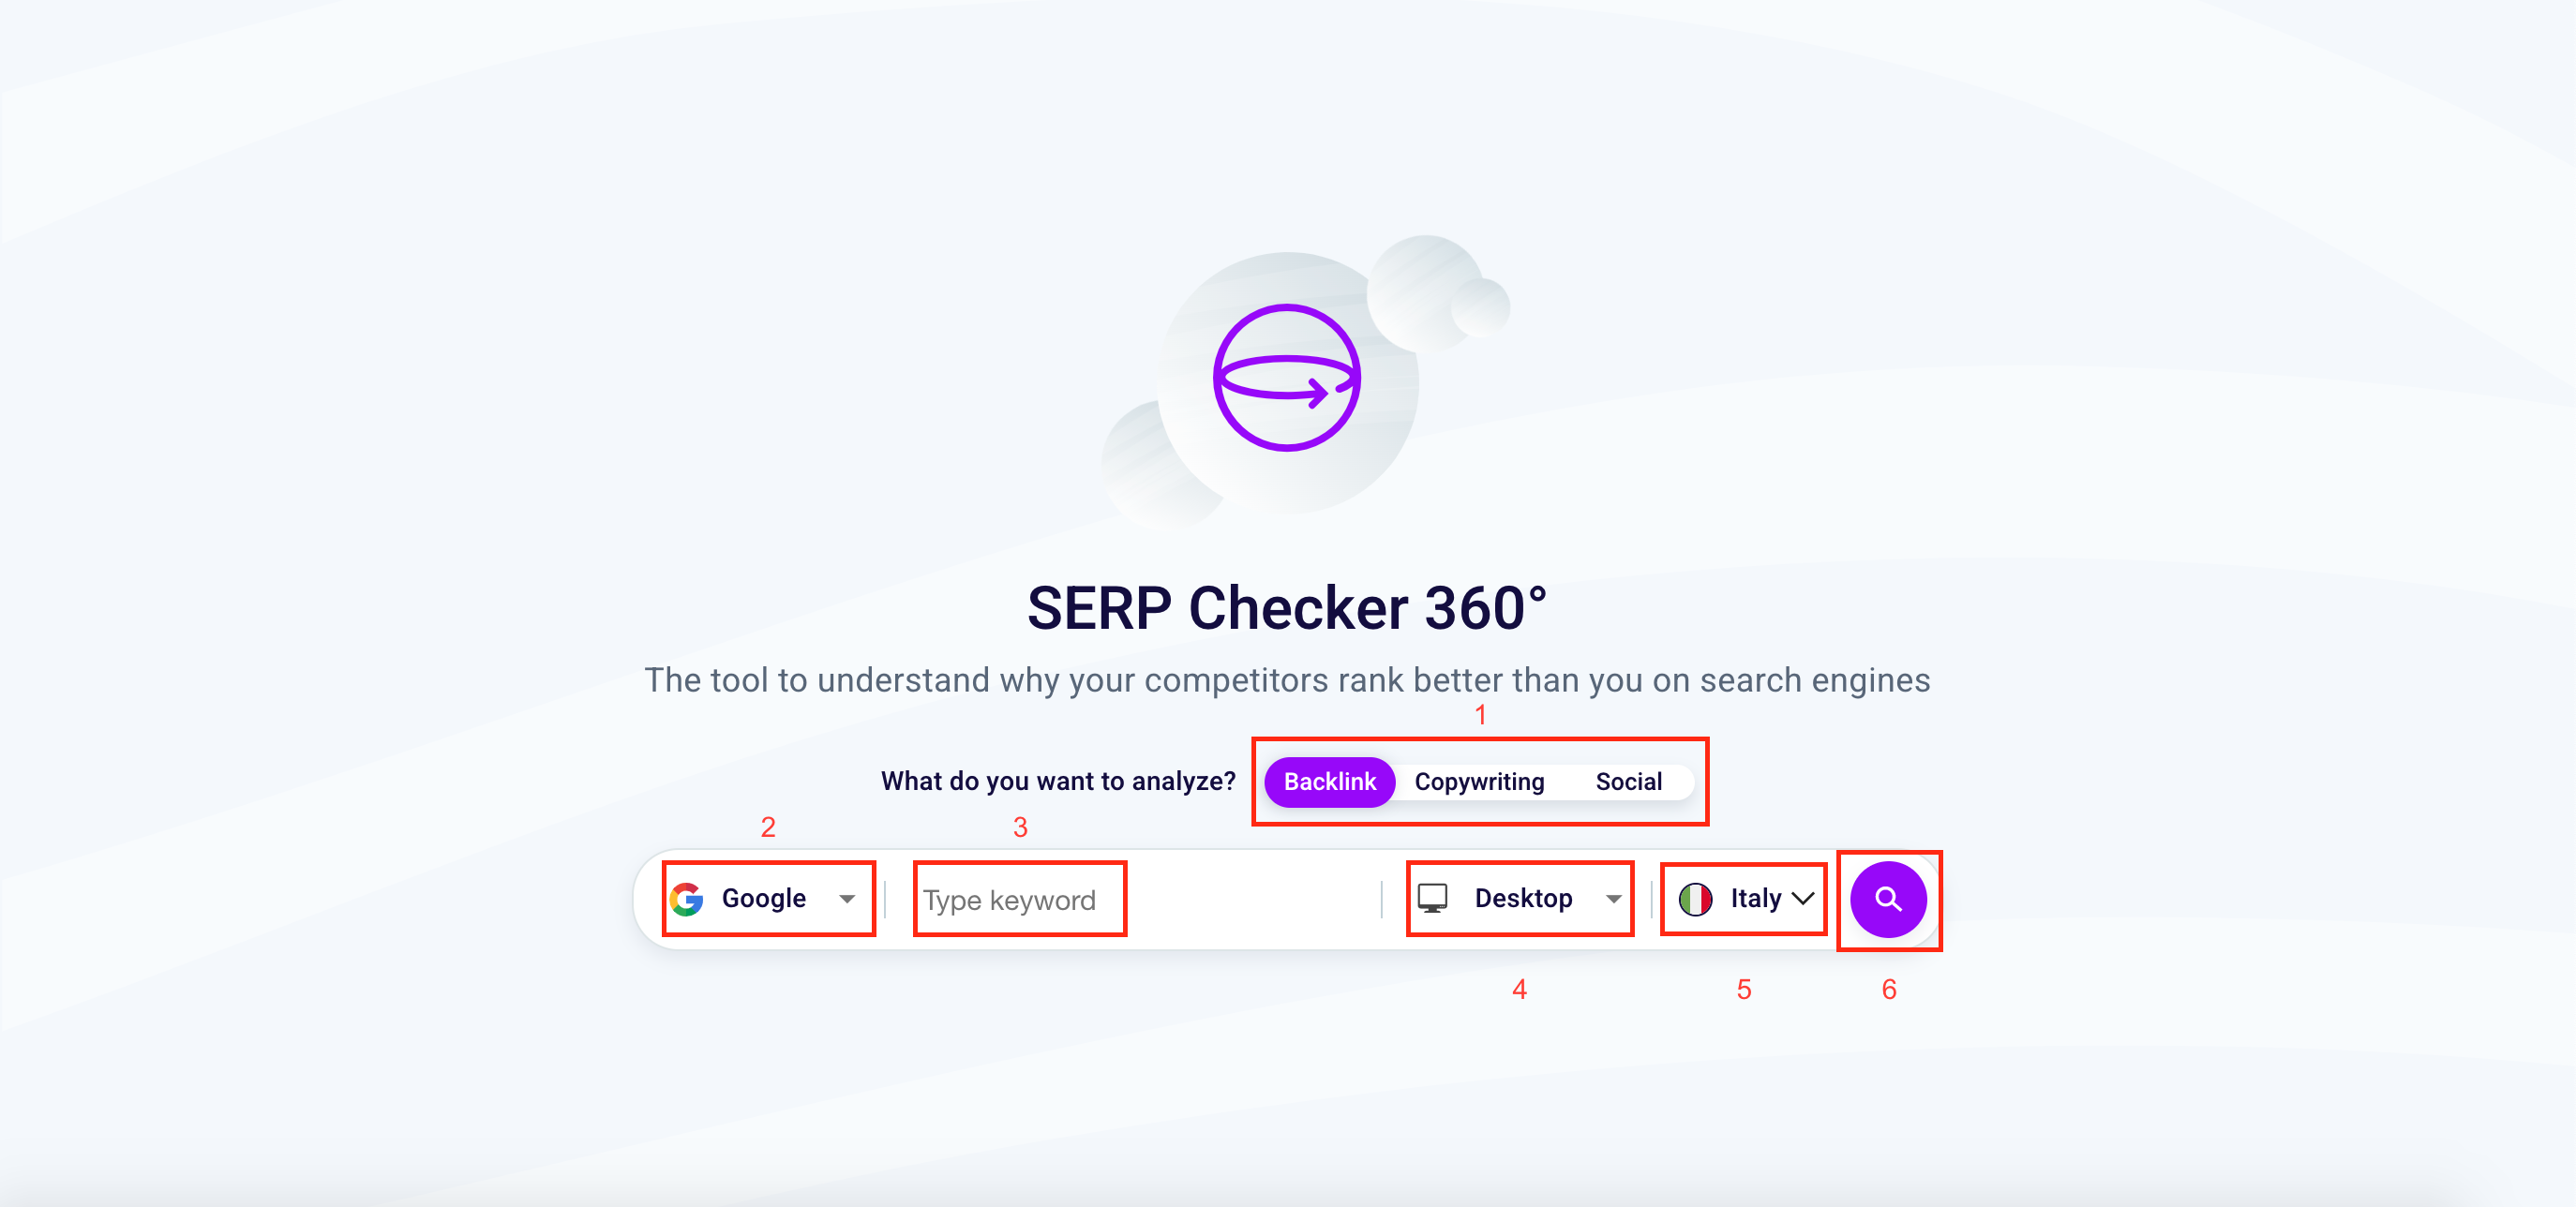
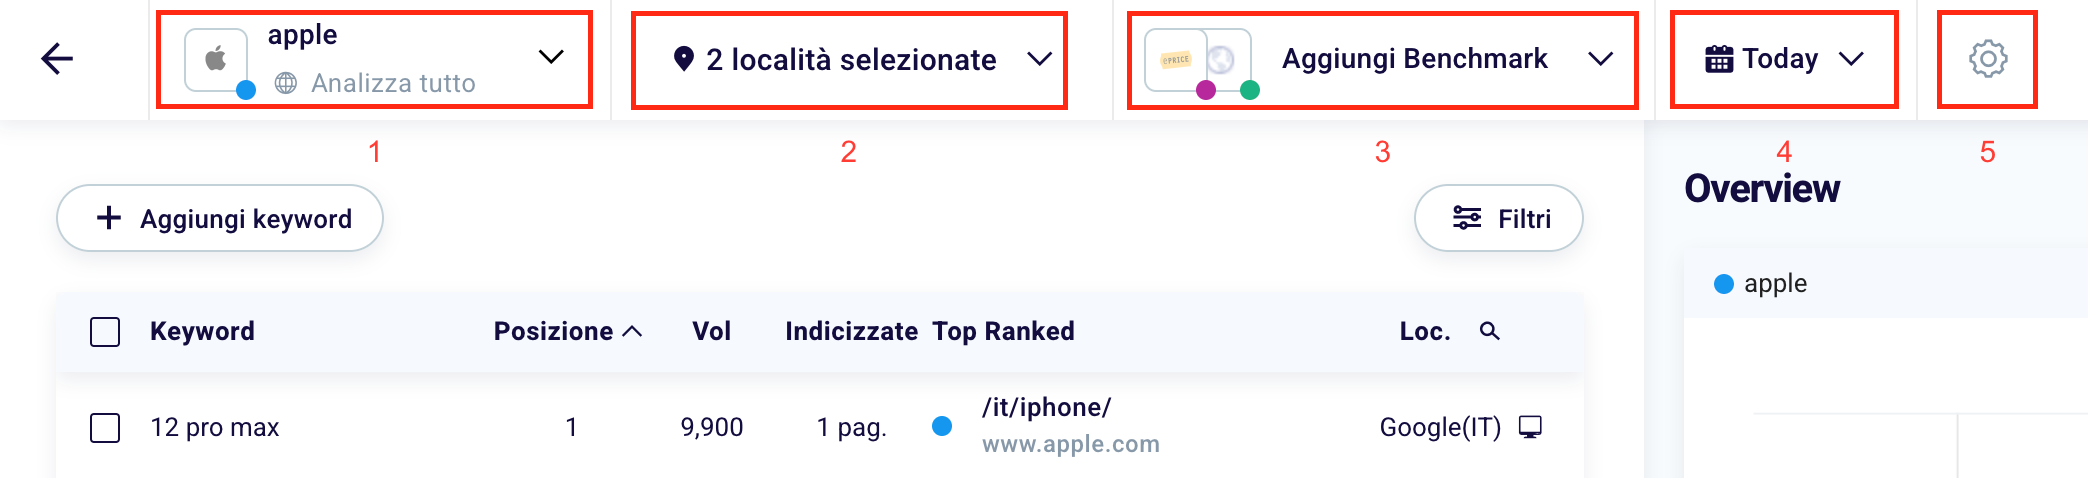
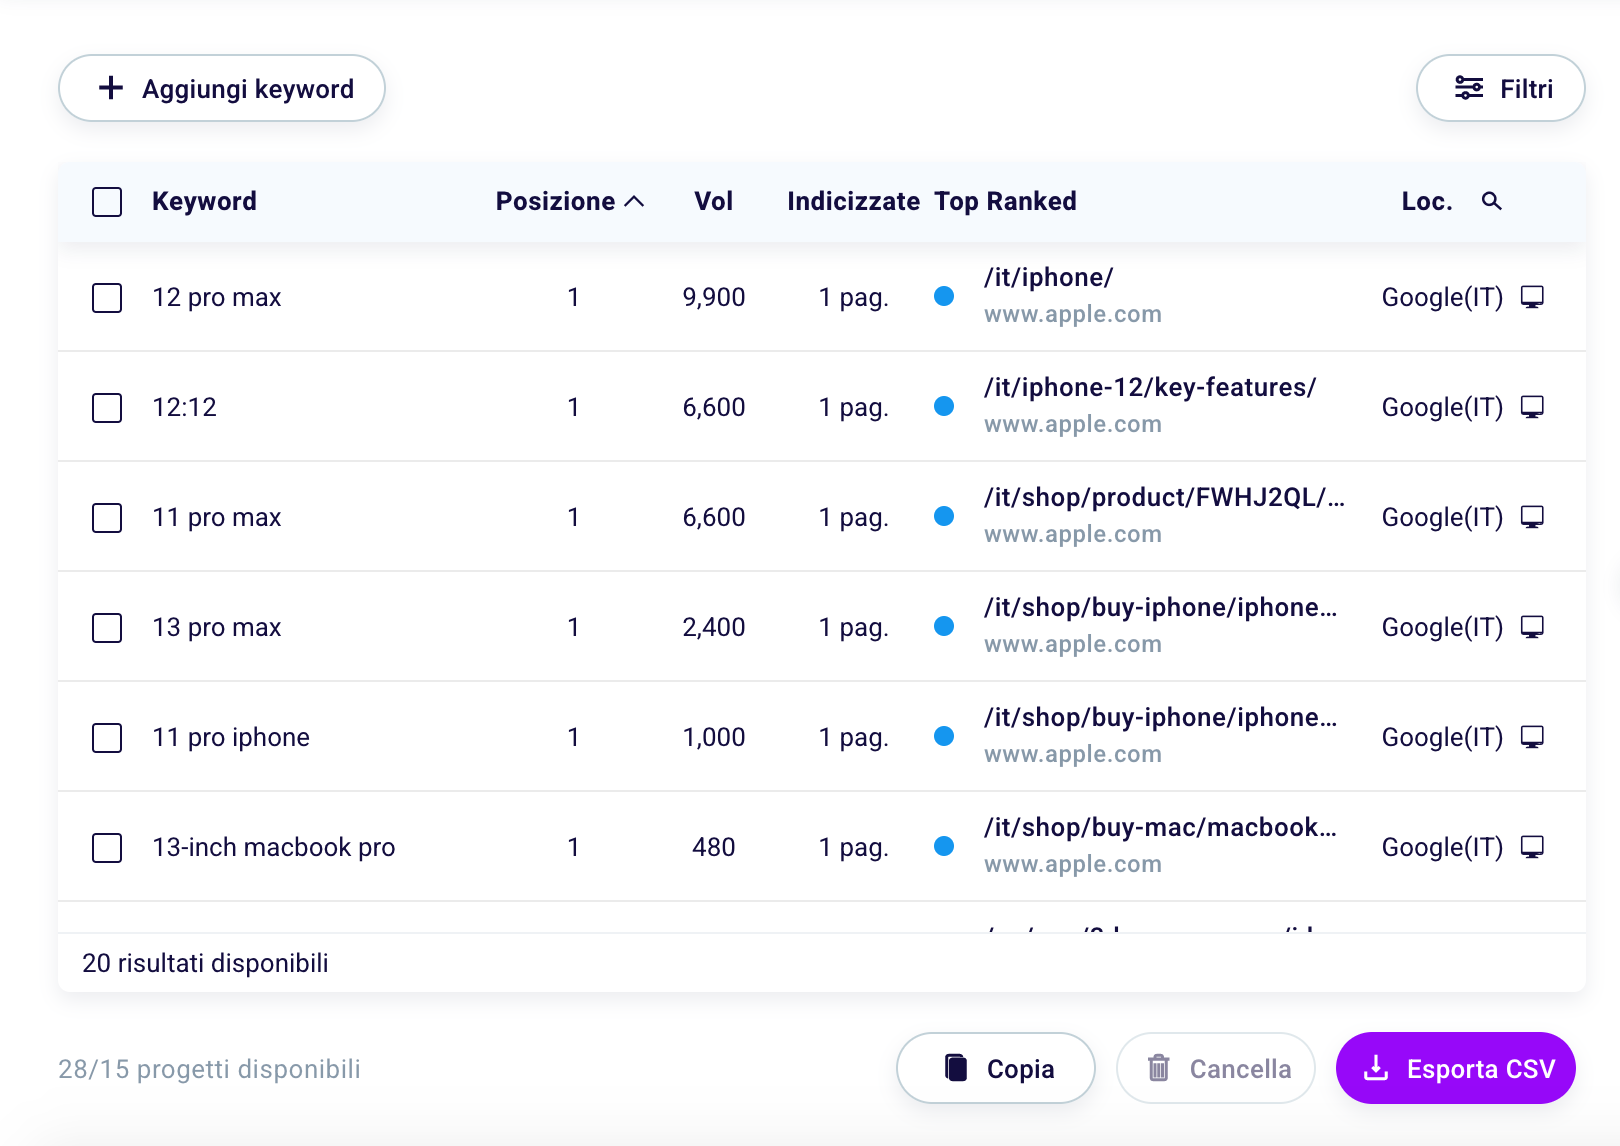
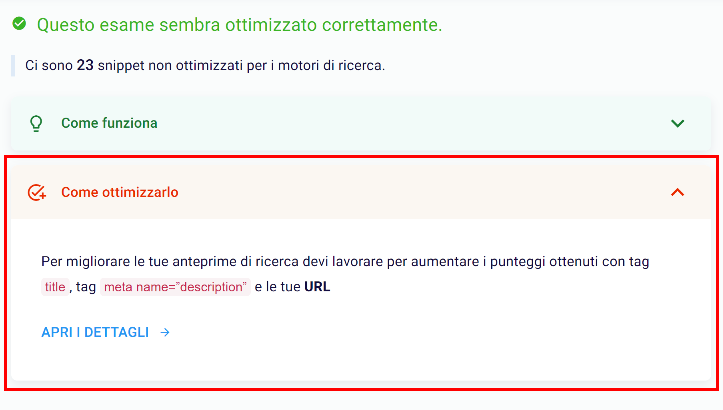
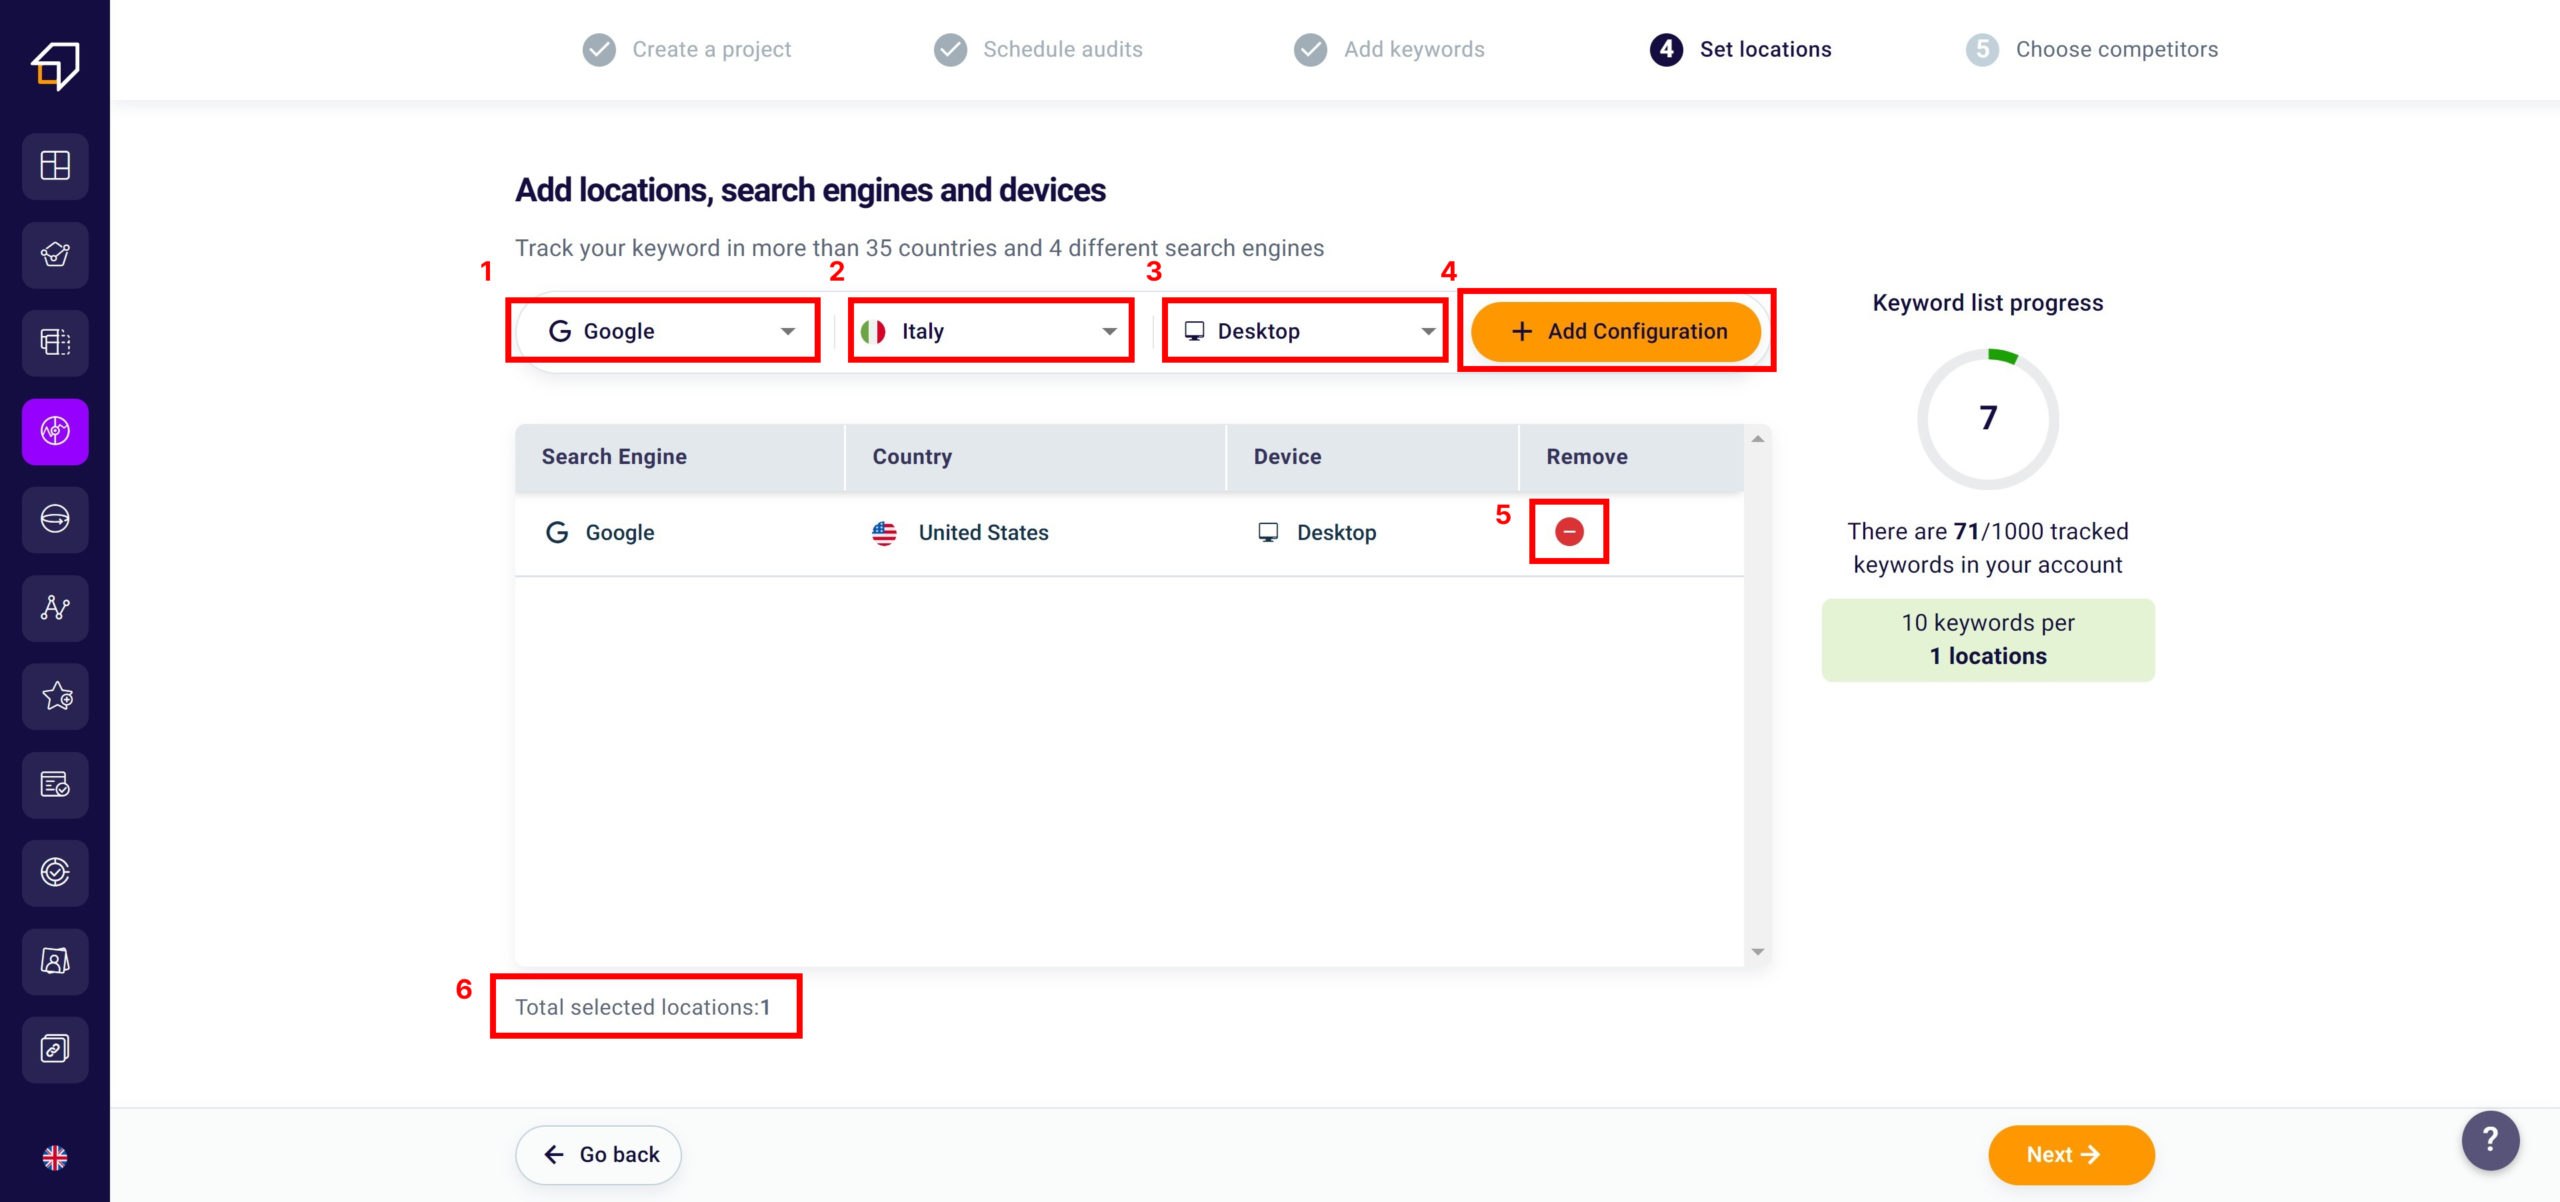
First choose which area to analyze from Backlinks, Copywriting, and Social (1). Then select a search engine from Google, Yahoo, Bing, and Yandex with the appropriate select (2). Enter the keyword for which you want to get the data in conjunction with the “Type a keyword” (3).
Want to understand how to find effective keywords? Follow our guidelines for keyword research.
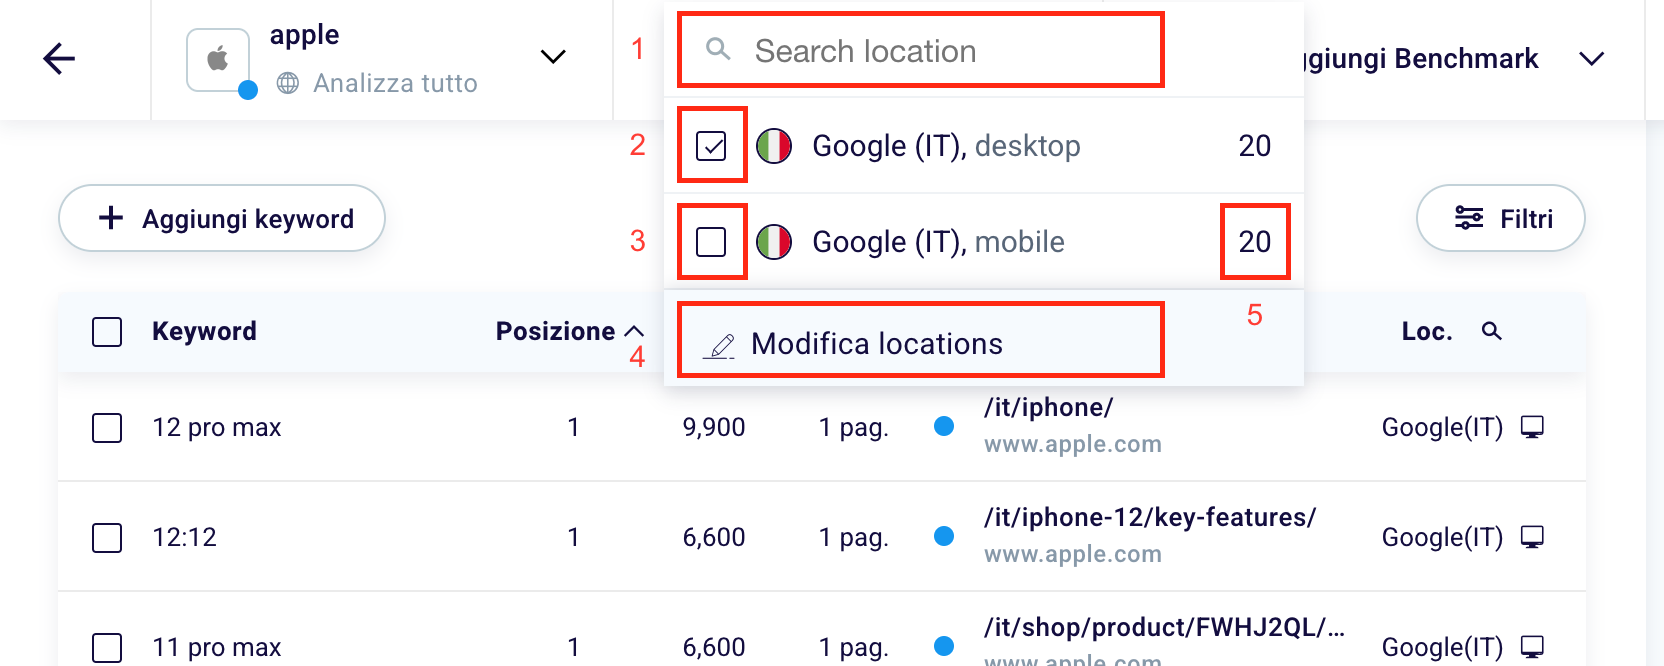
Select the device for which to conduct the analysis between desktop and mobile (4) one of the 36 countries available (5) and start analyzing your competitors by clicking the magnifying glass in purple (6).
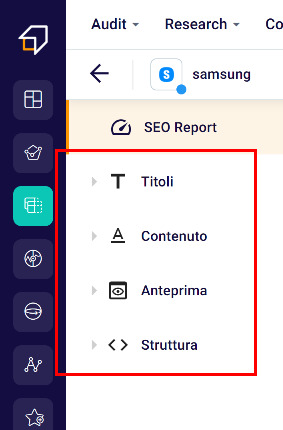
How to choose and switch the aspect analyze?
Finally, you have to choose the aspect you want to analyze. Just click either on Backlinks, Copywriting, or Social. If you’re undecided, don’t worry! You can always switch from one aspect to the other at any moment.
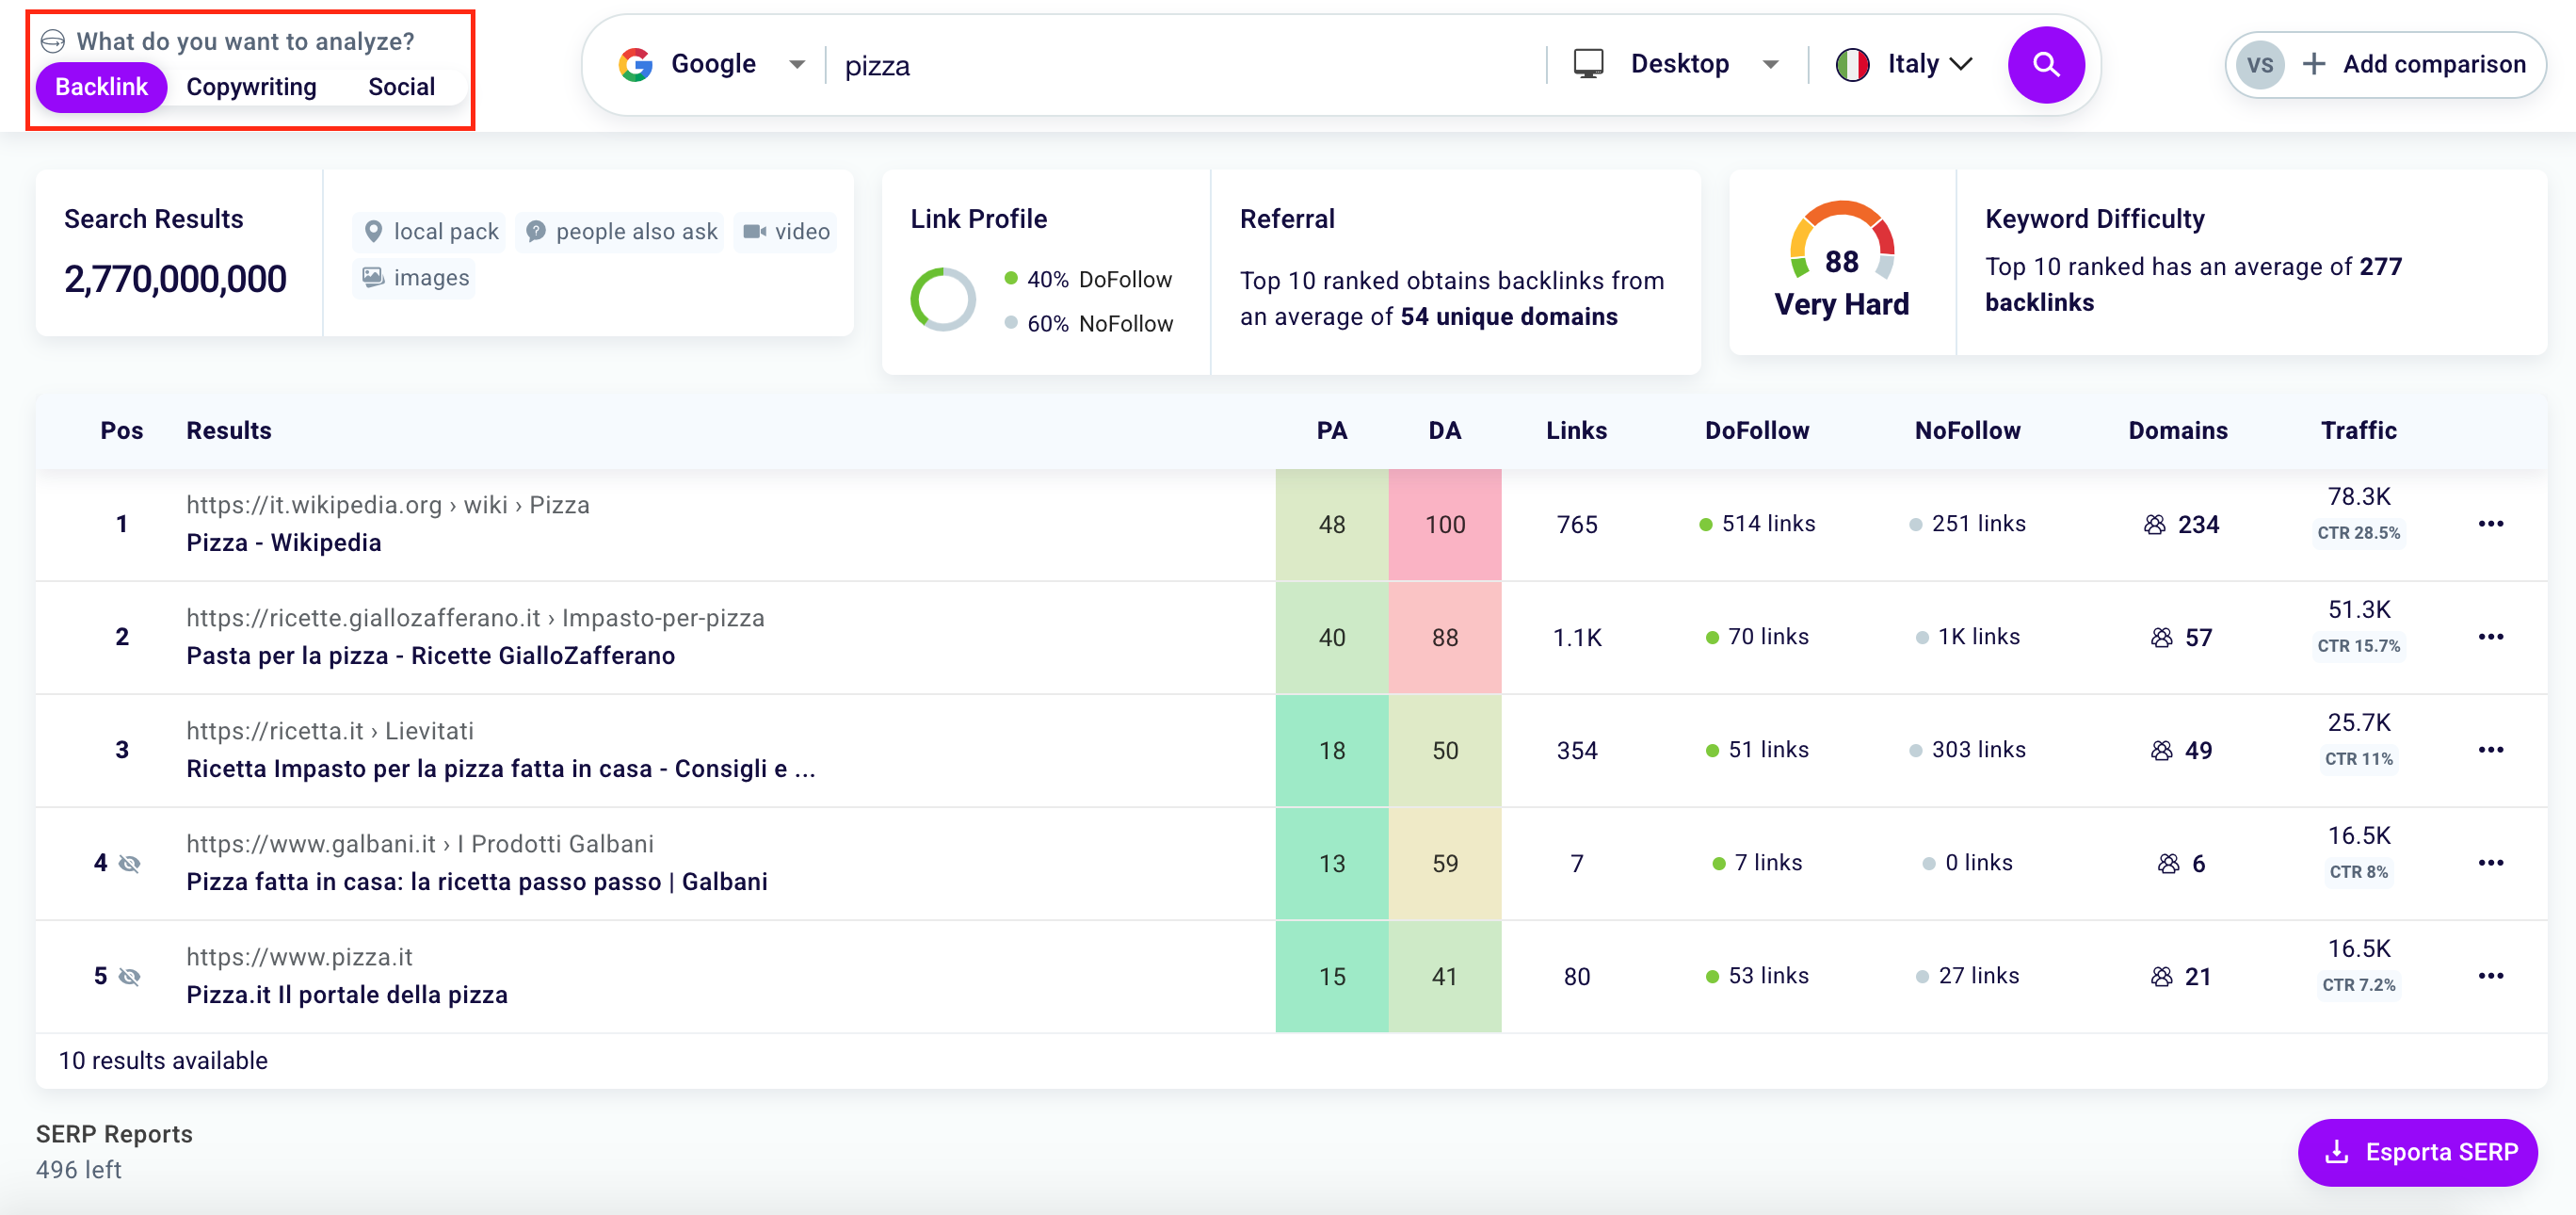
Backlinks
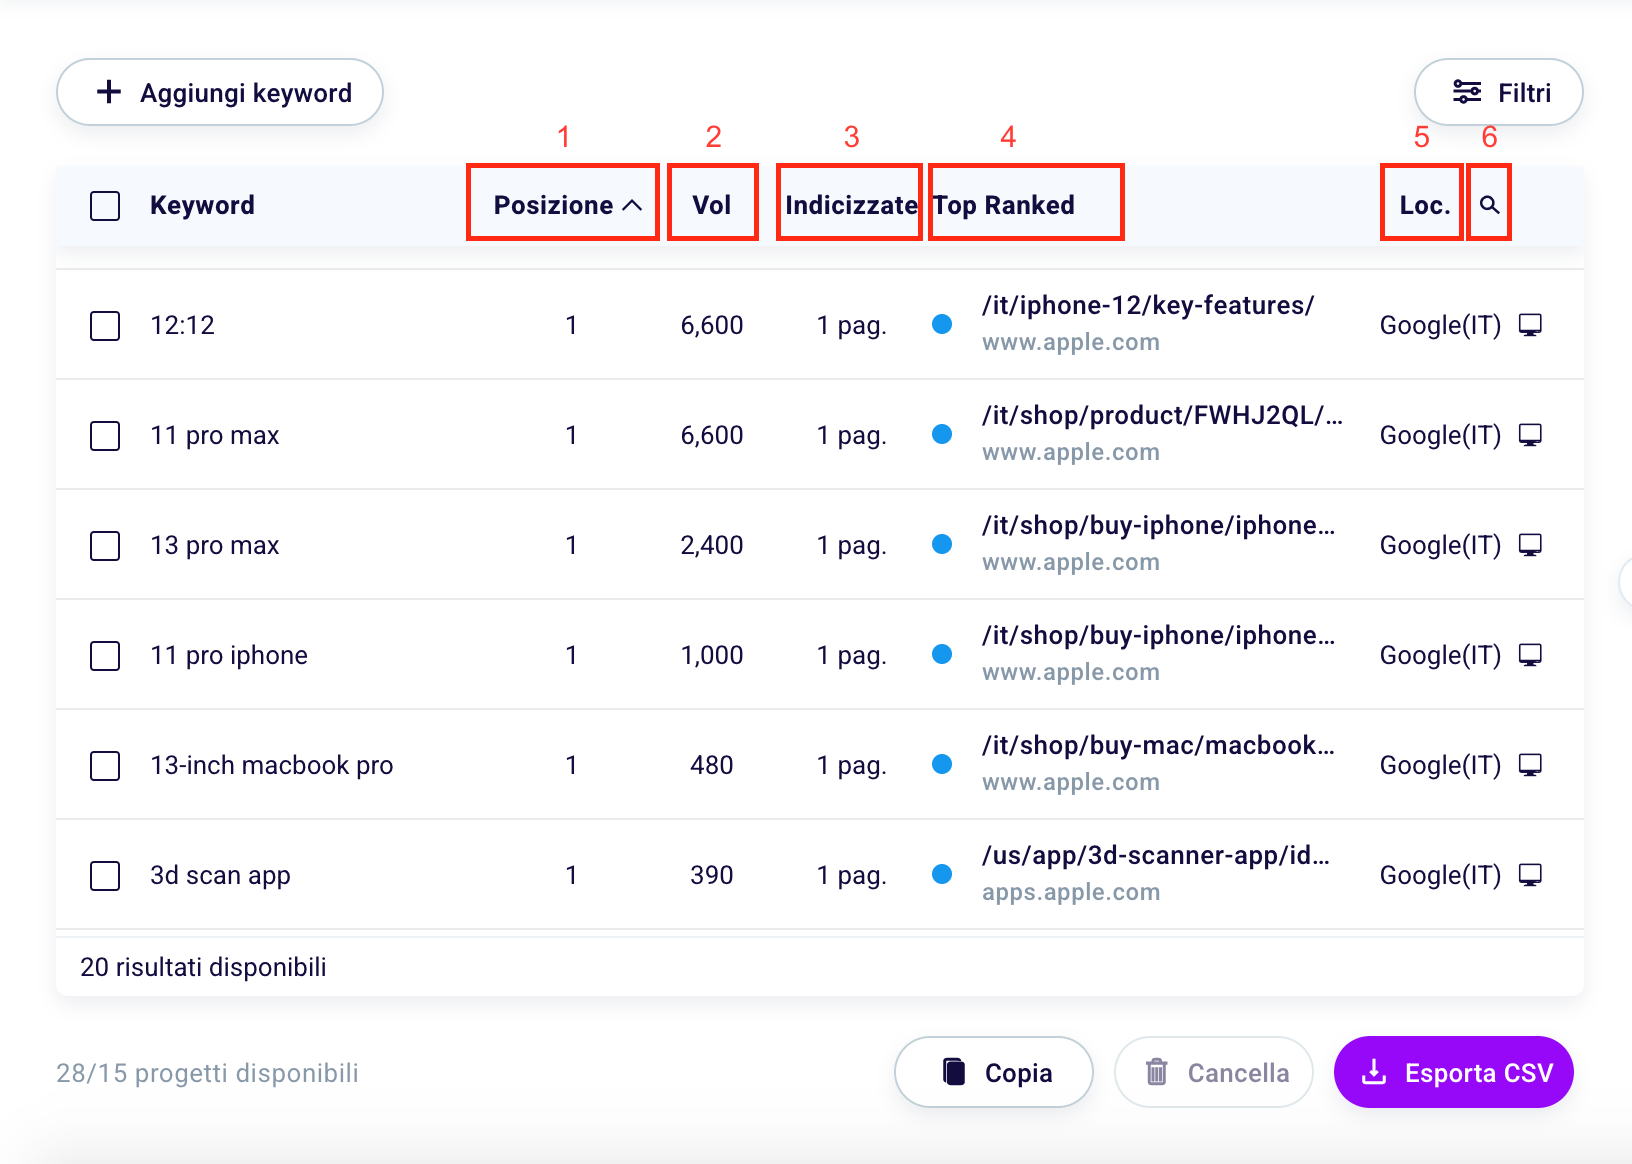
Here you’ll analyze the keyword difficulty, the number of inbound links for each result within the SERP, the domain and page authority, and the click-through rate. Go to the guide.
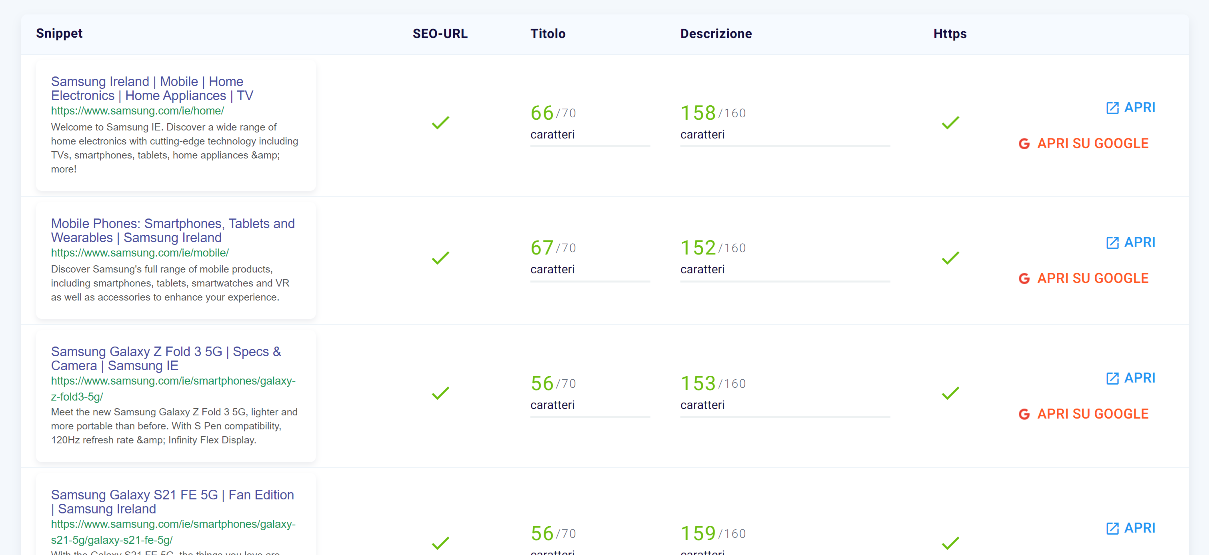
Copywriting
On this screen, for each result, you’ll be able to see the number of languages your competition’s content is translated into and all the metrics you can see on the copy metrics. Go to the guide.
Social
Here you’ll be able to see how your competitors’ content is performing on the social networks. You can see at a glance the number of shares, comments, and reactions for every result within the SERP. Go to the guide.
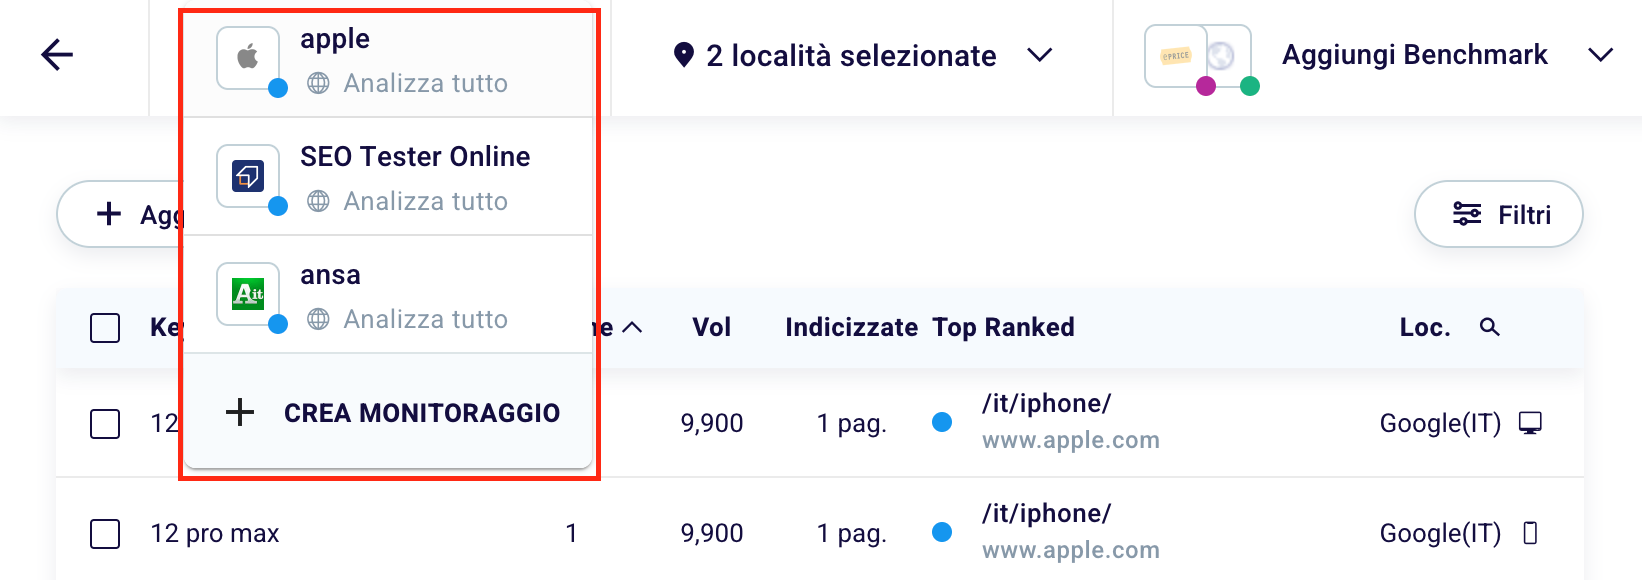
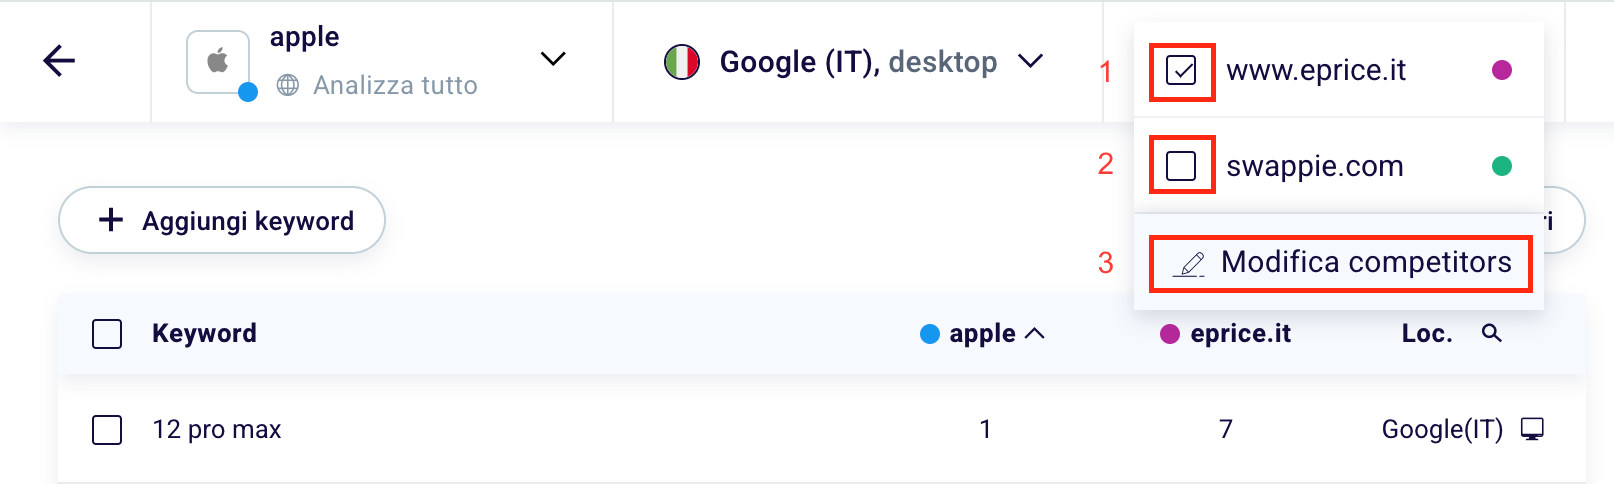
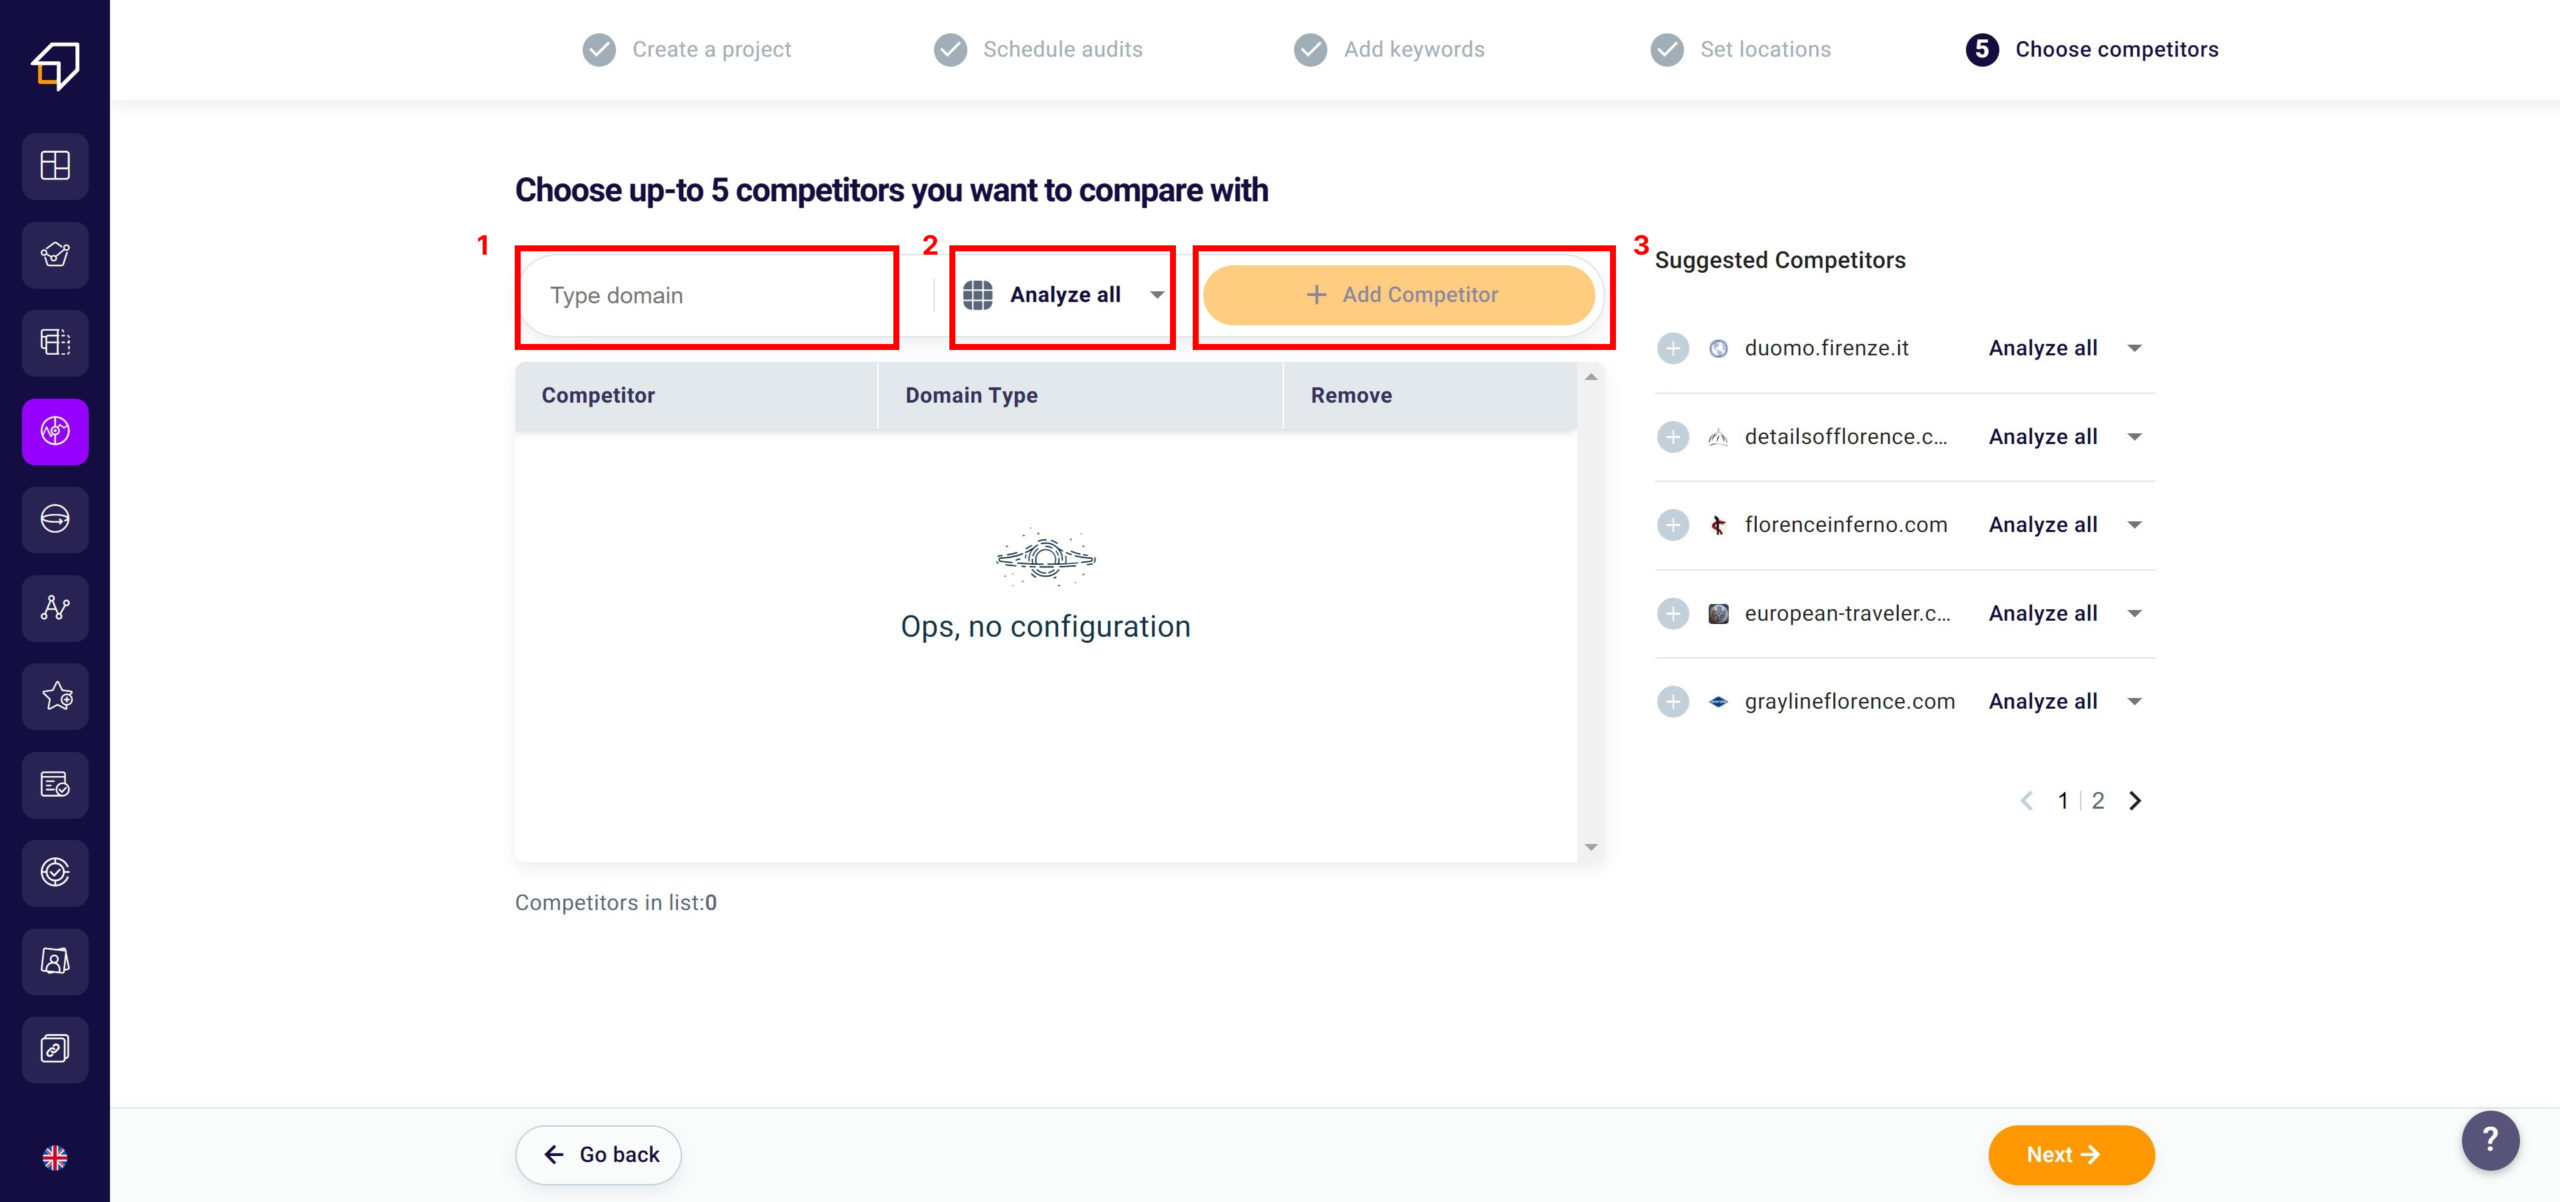
How to add competitors to your analysis?
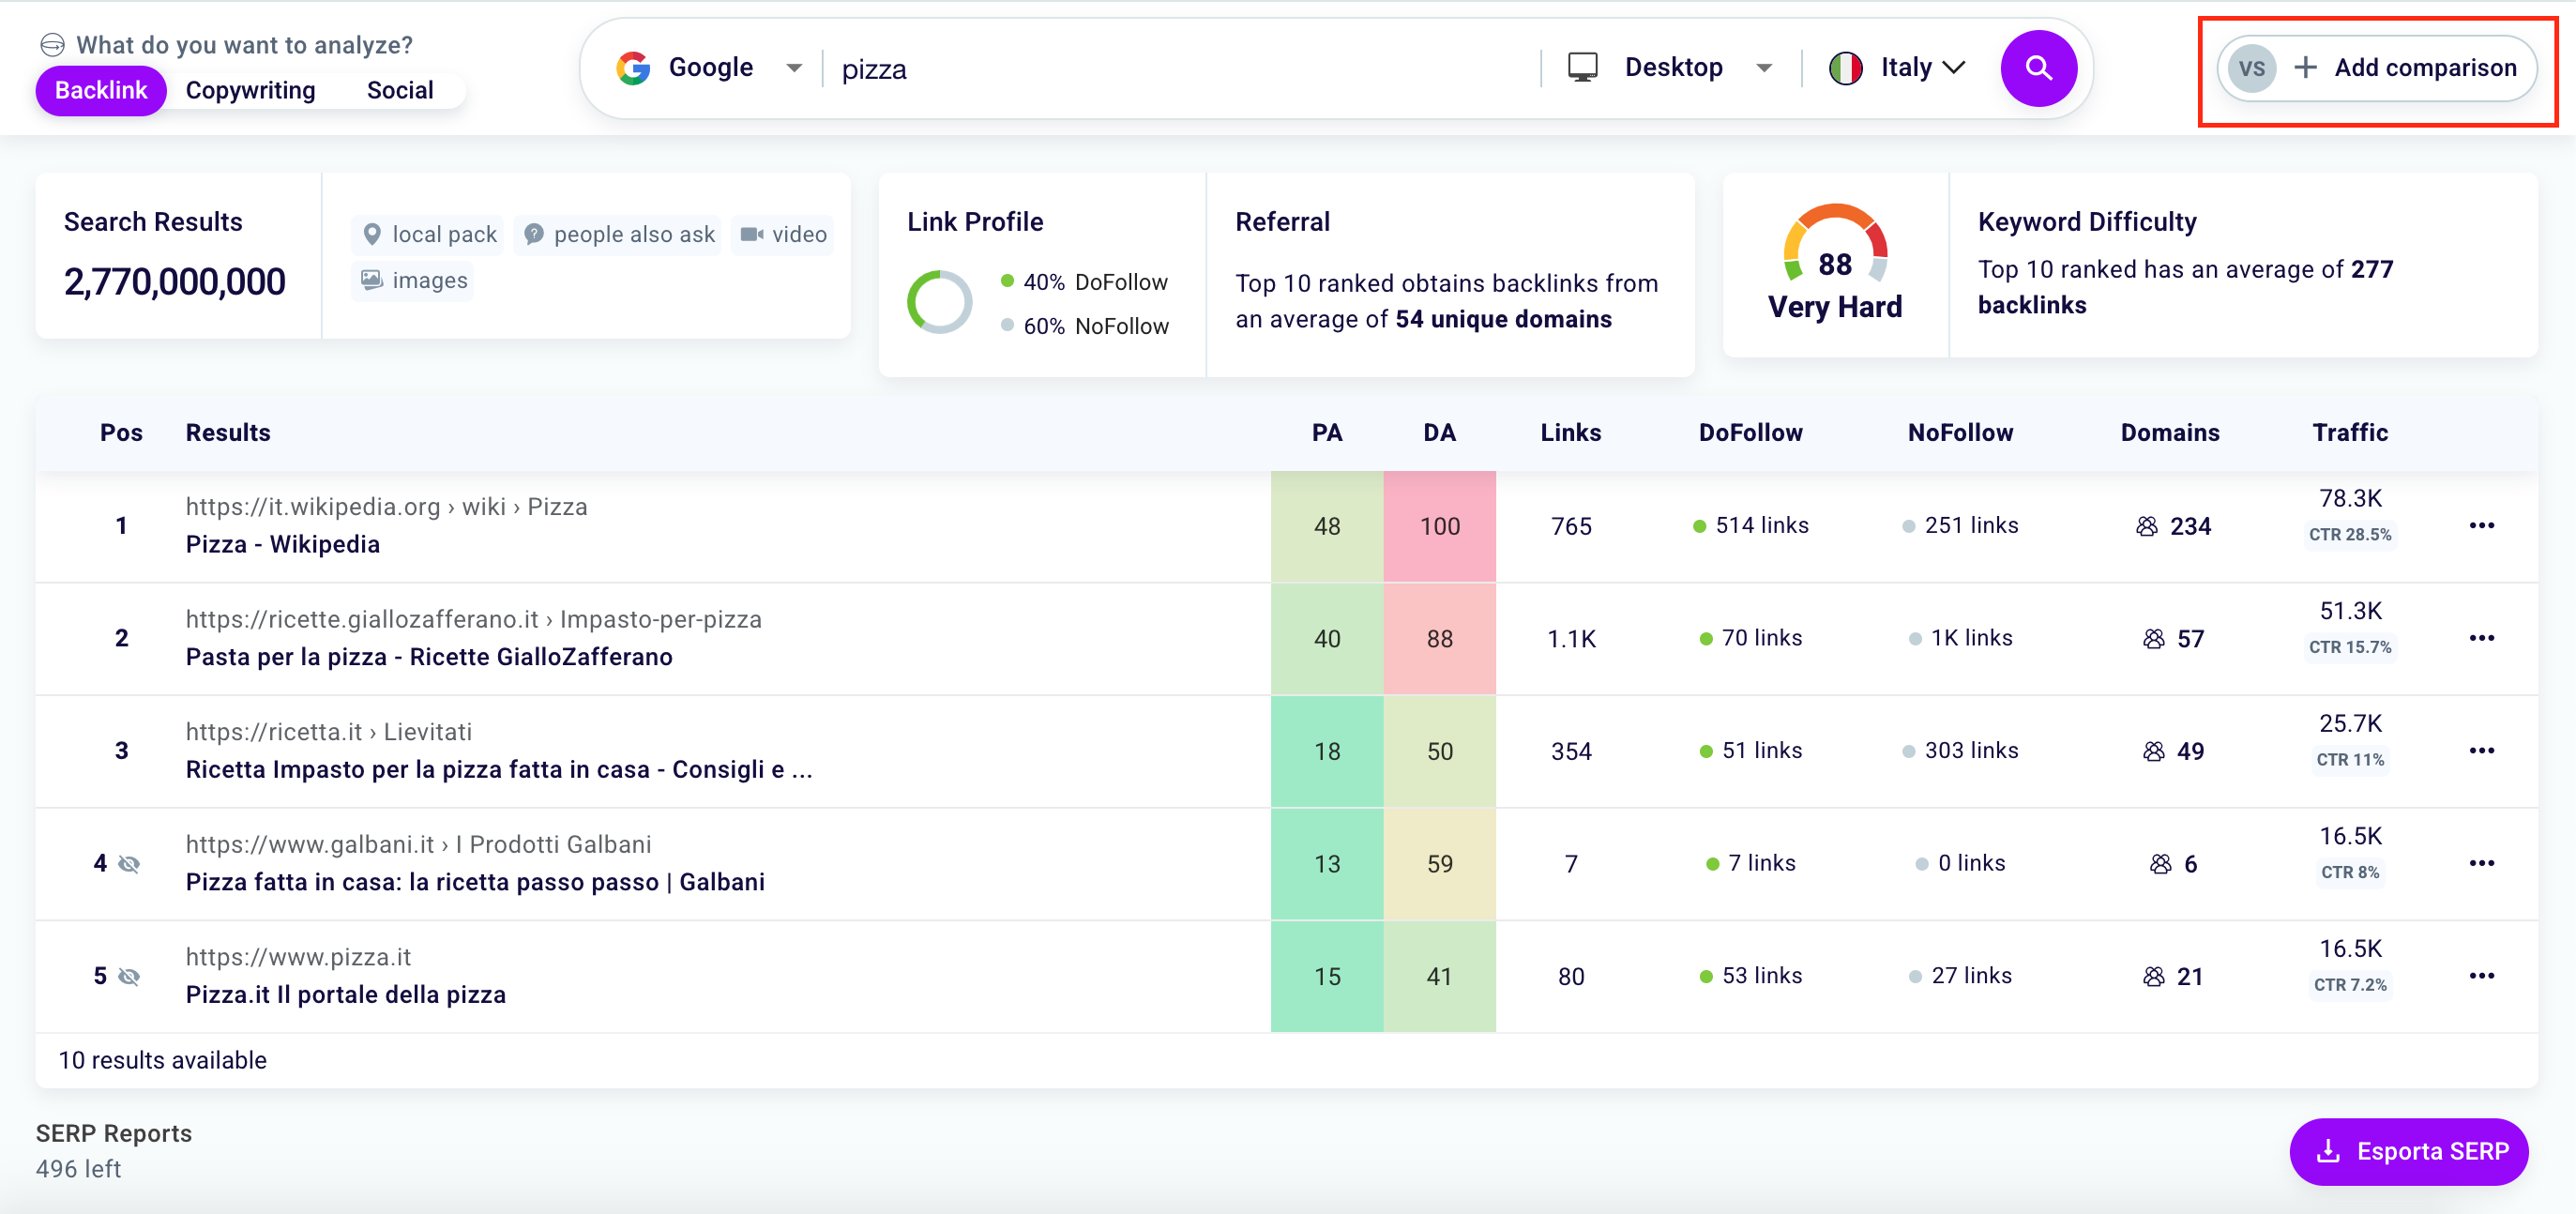
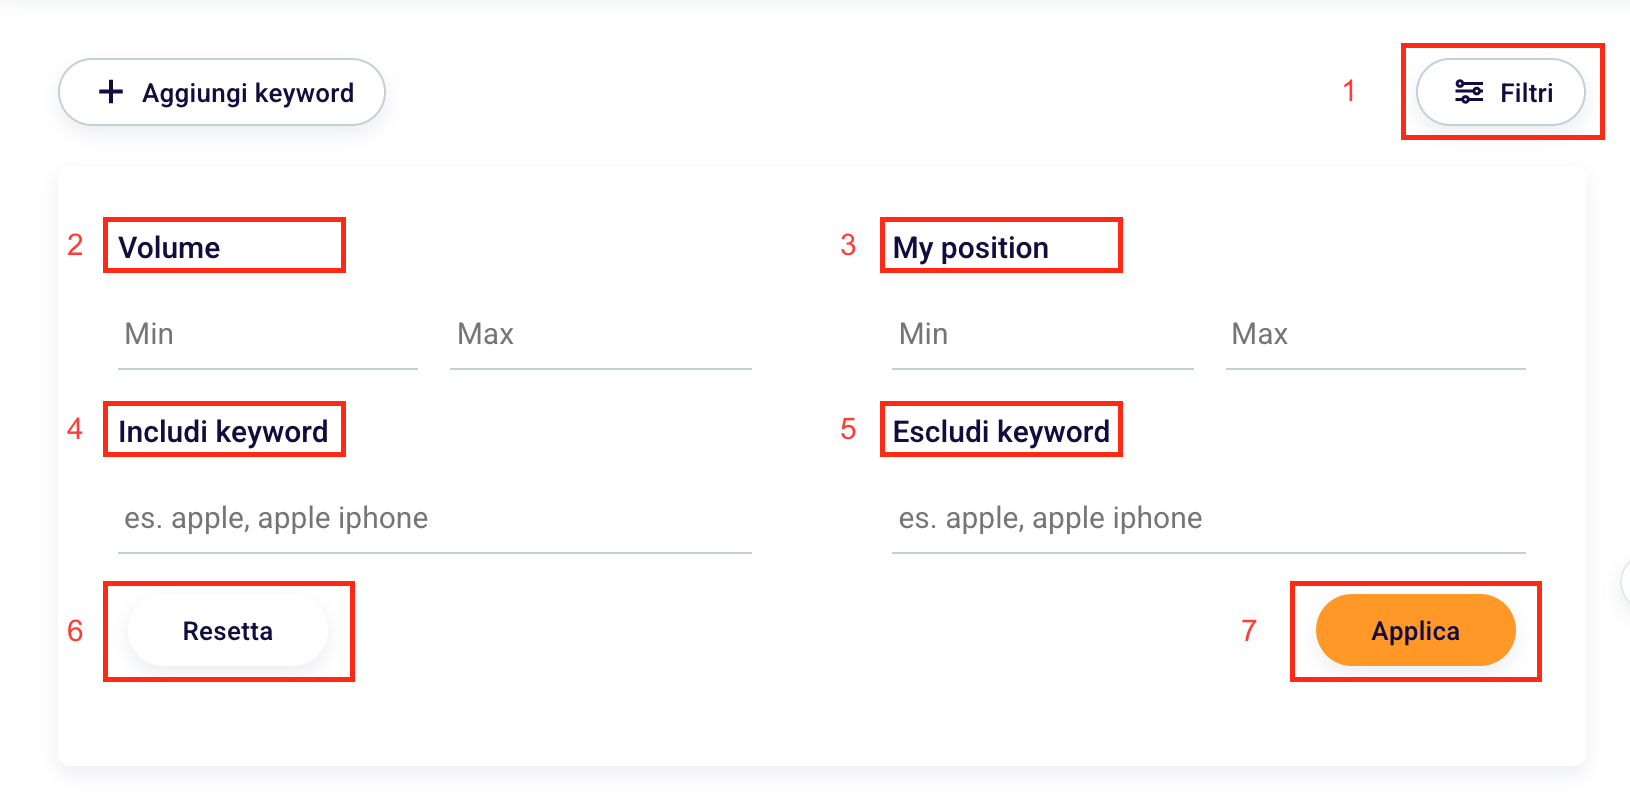
To add a comparison to your SERP analysis simply click the button at the top right “+ Add Comparison” (as shown in the image) and enter your site or that of competitors and compare the results.
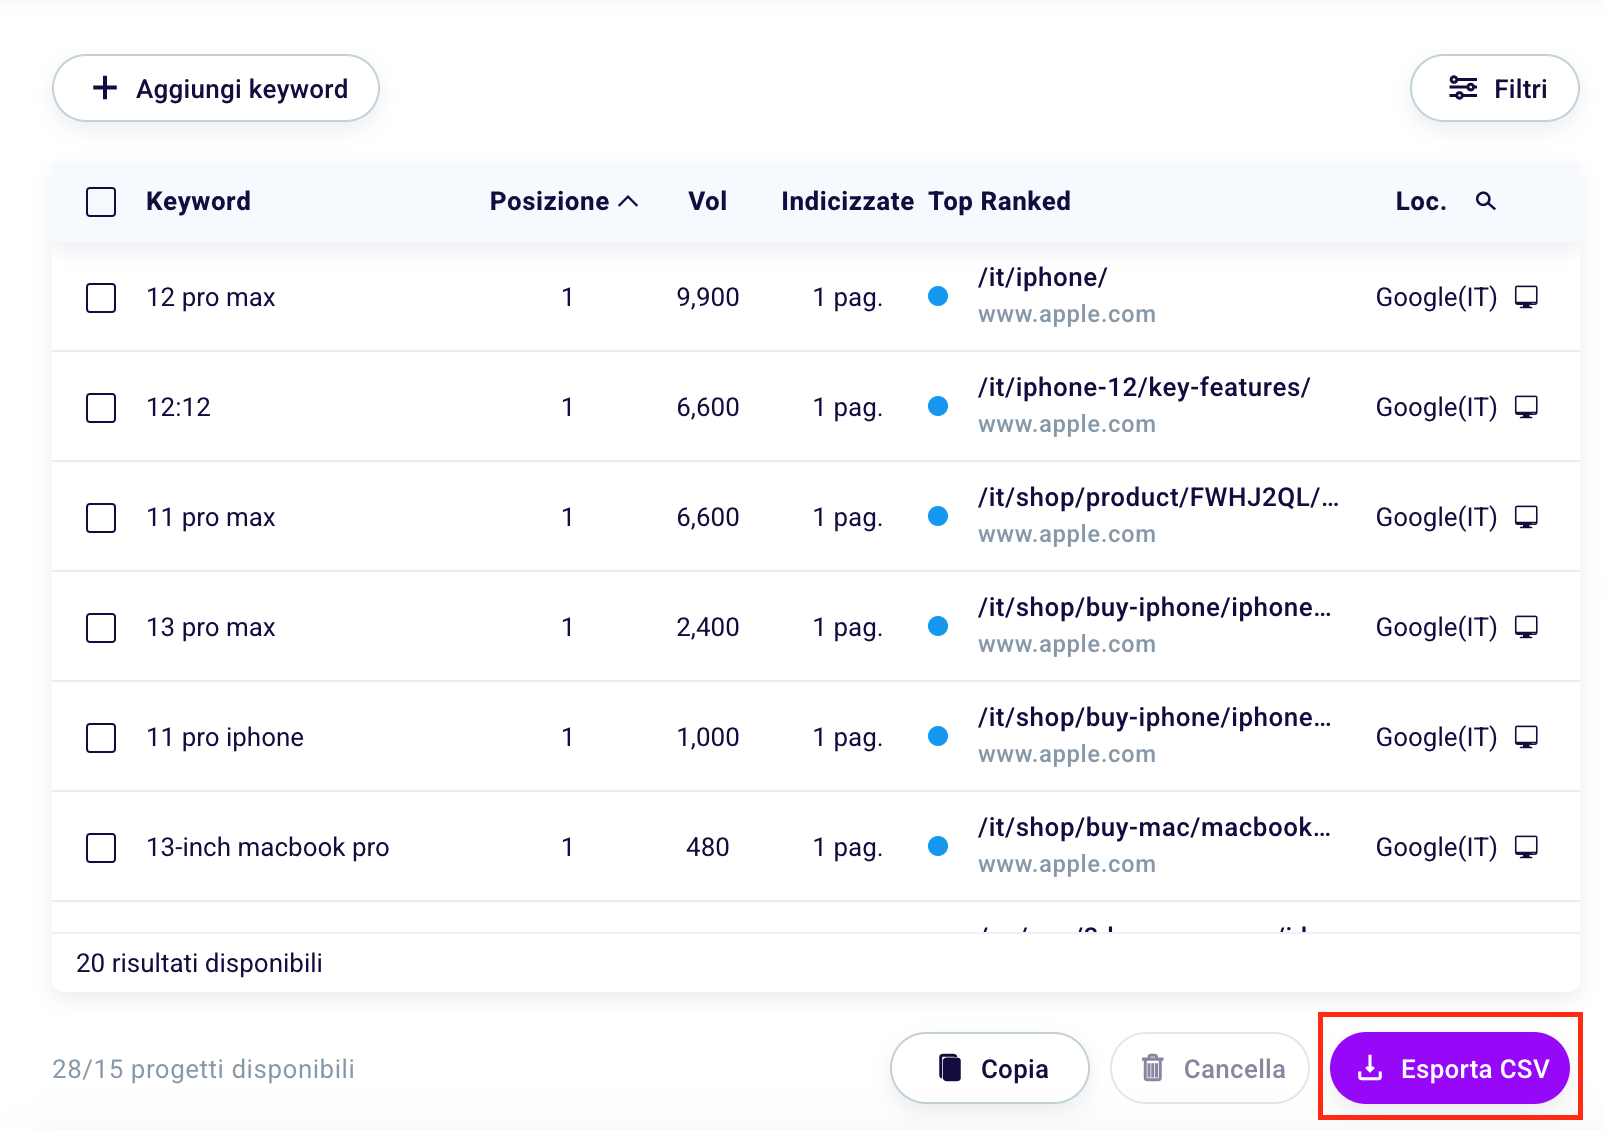
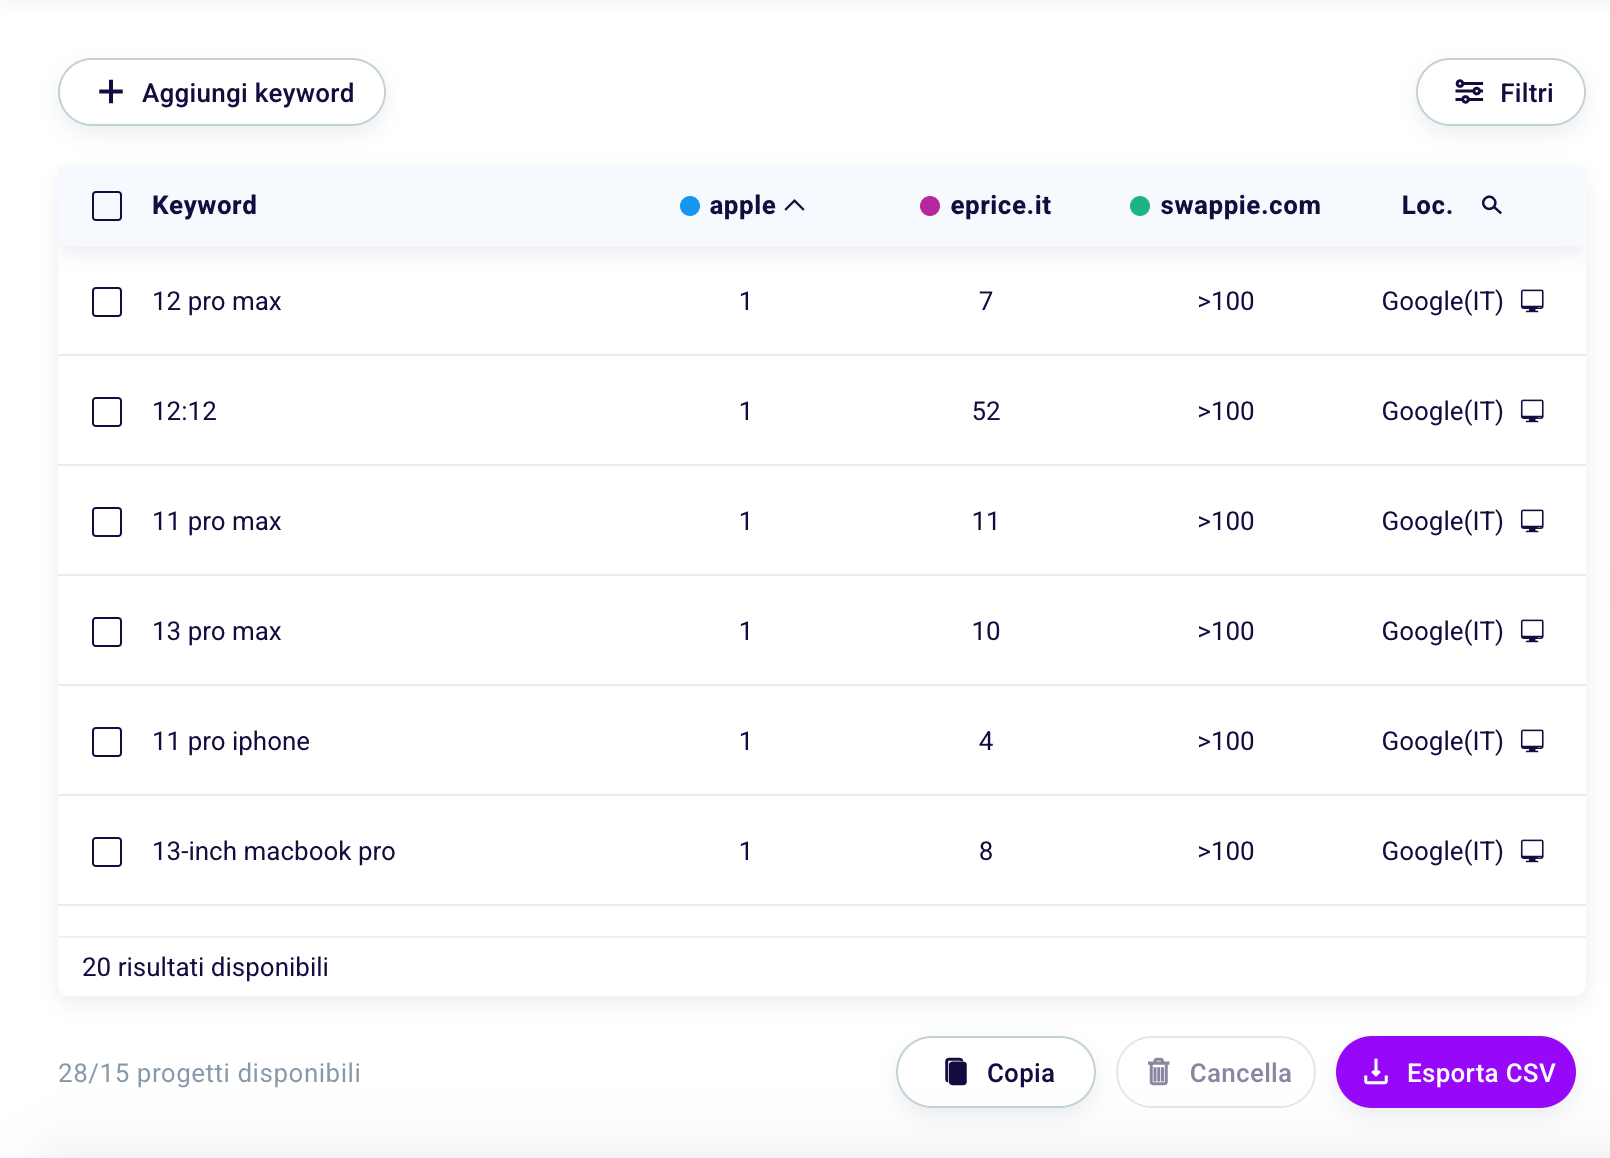
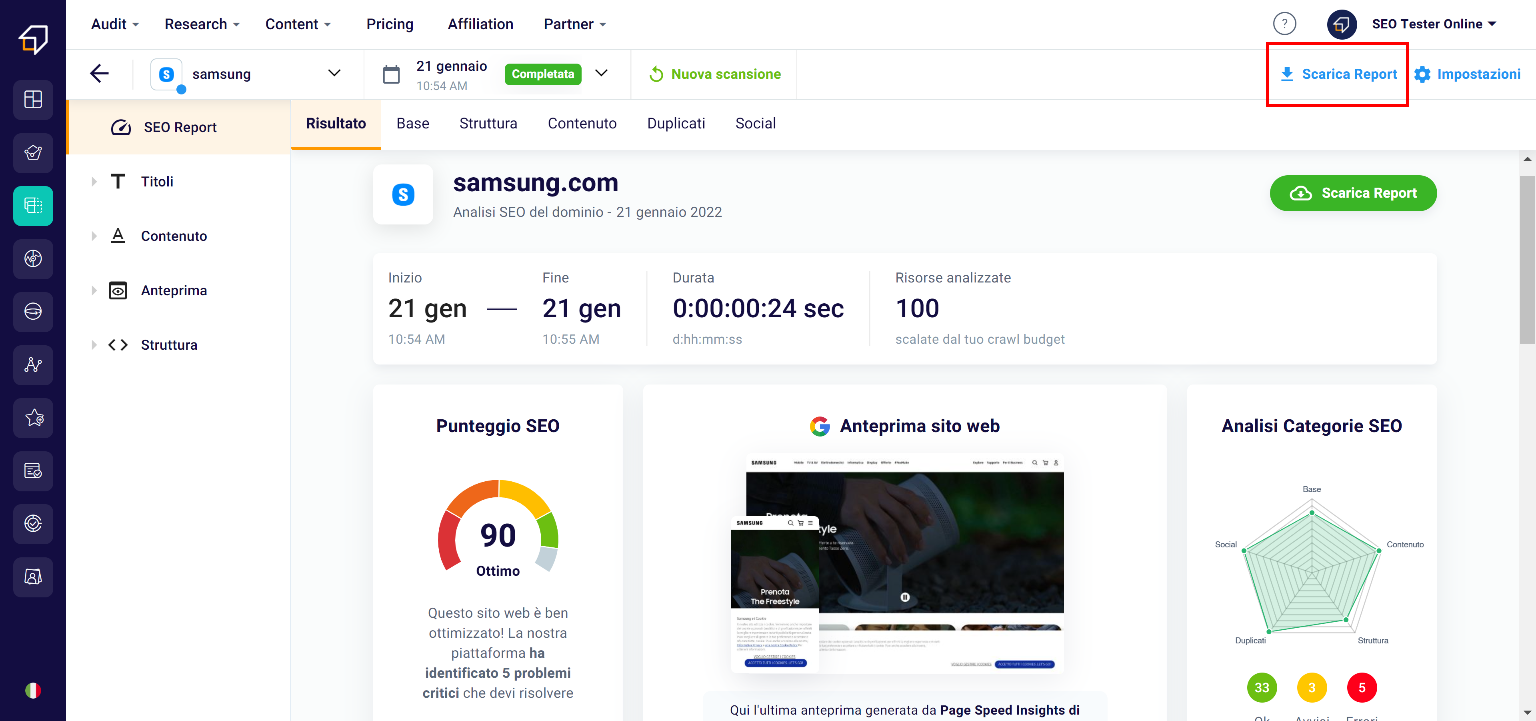
How to export SERP metrics?
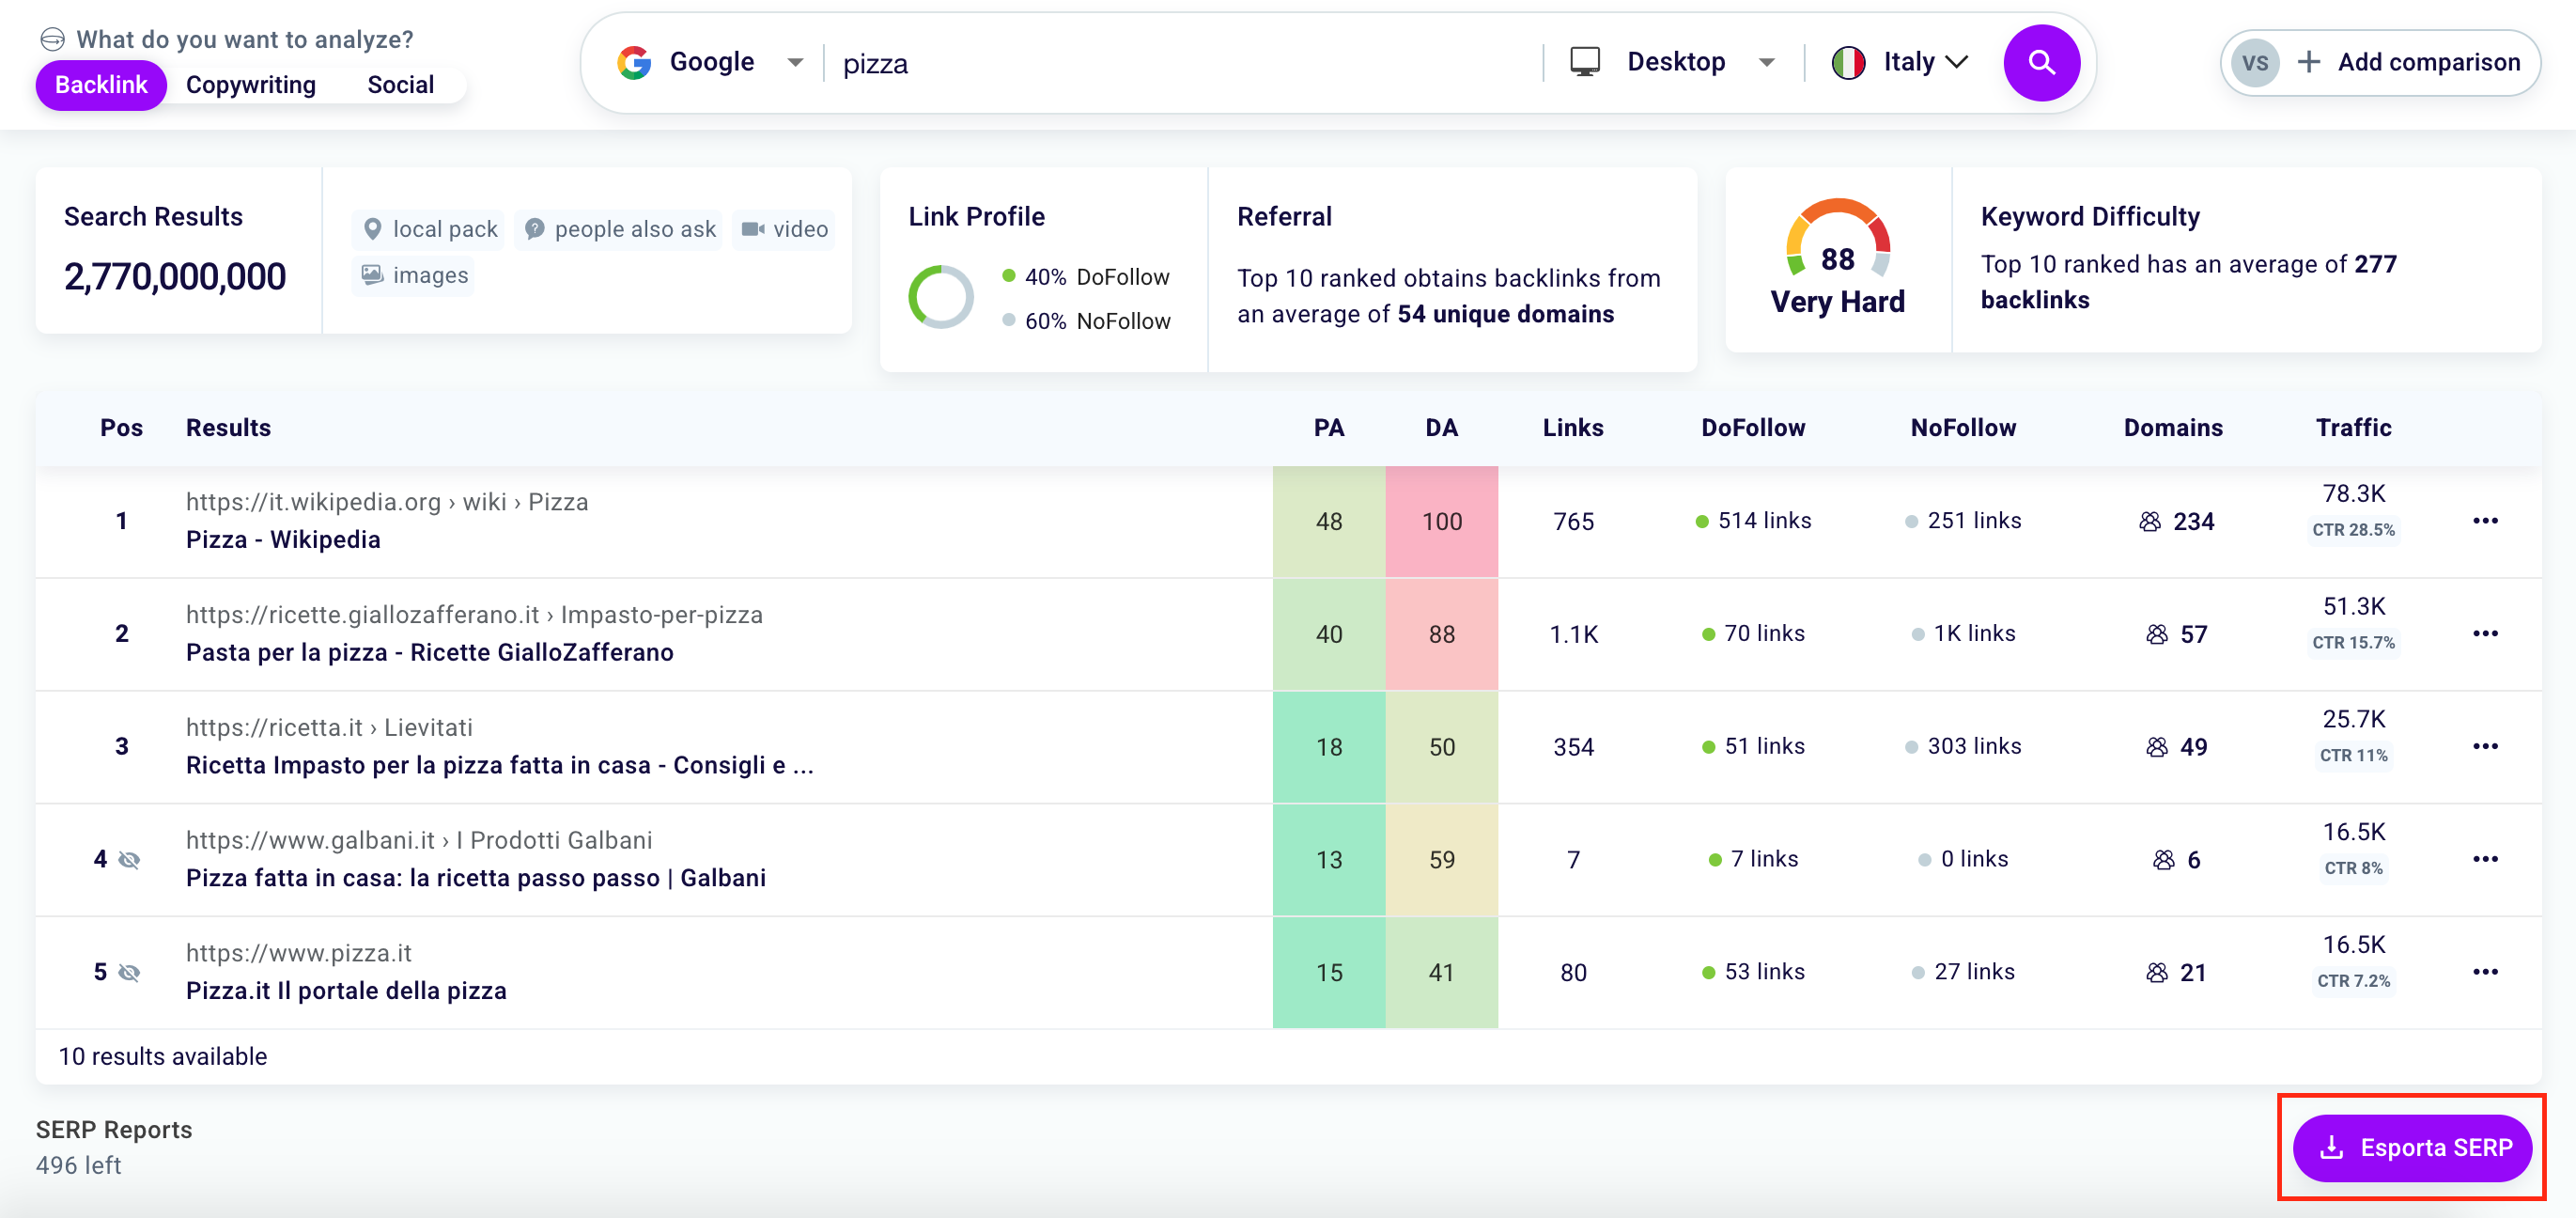
To export in a .csv file the results of the SERP analyzed with our software, you will only have to click the purple button at the bottom right “Export SERP“.
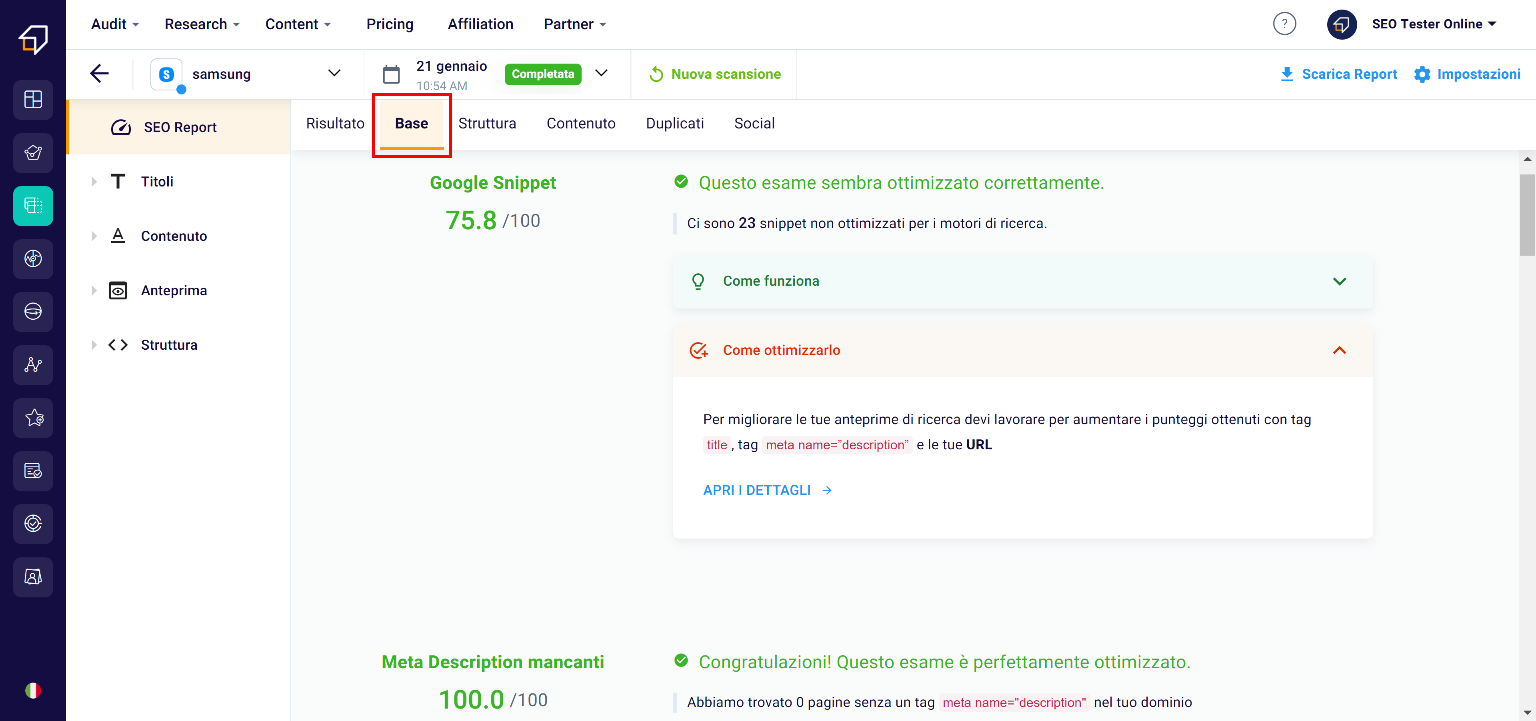
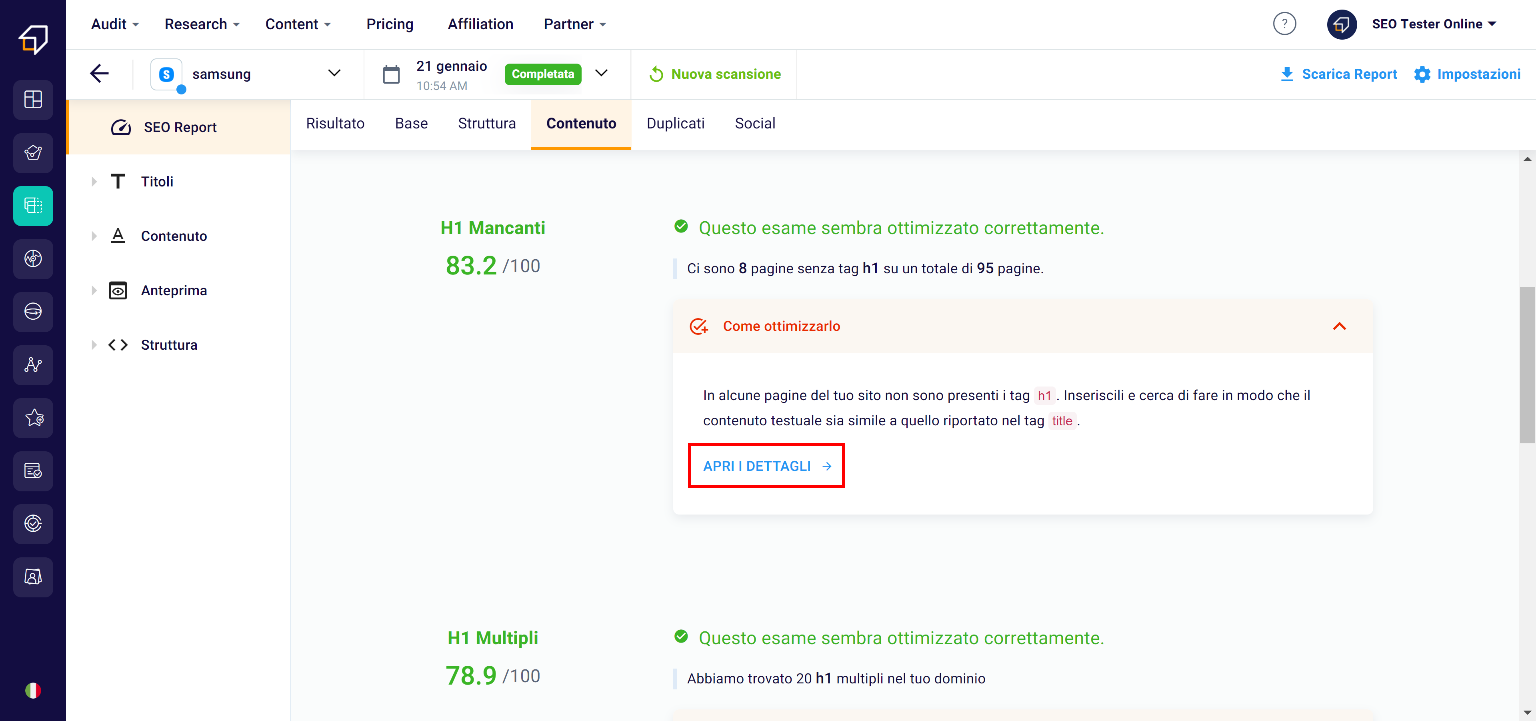
How to interpret the backlinks section of SERP Checker 360°?
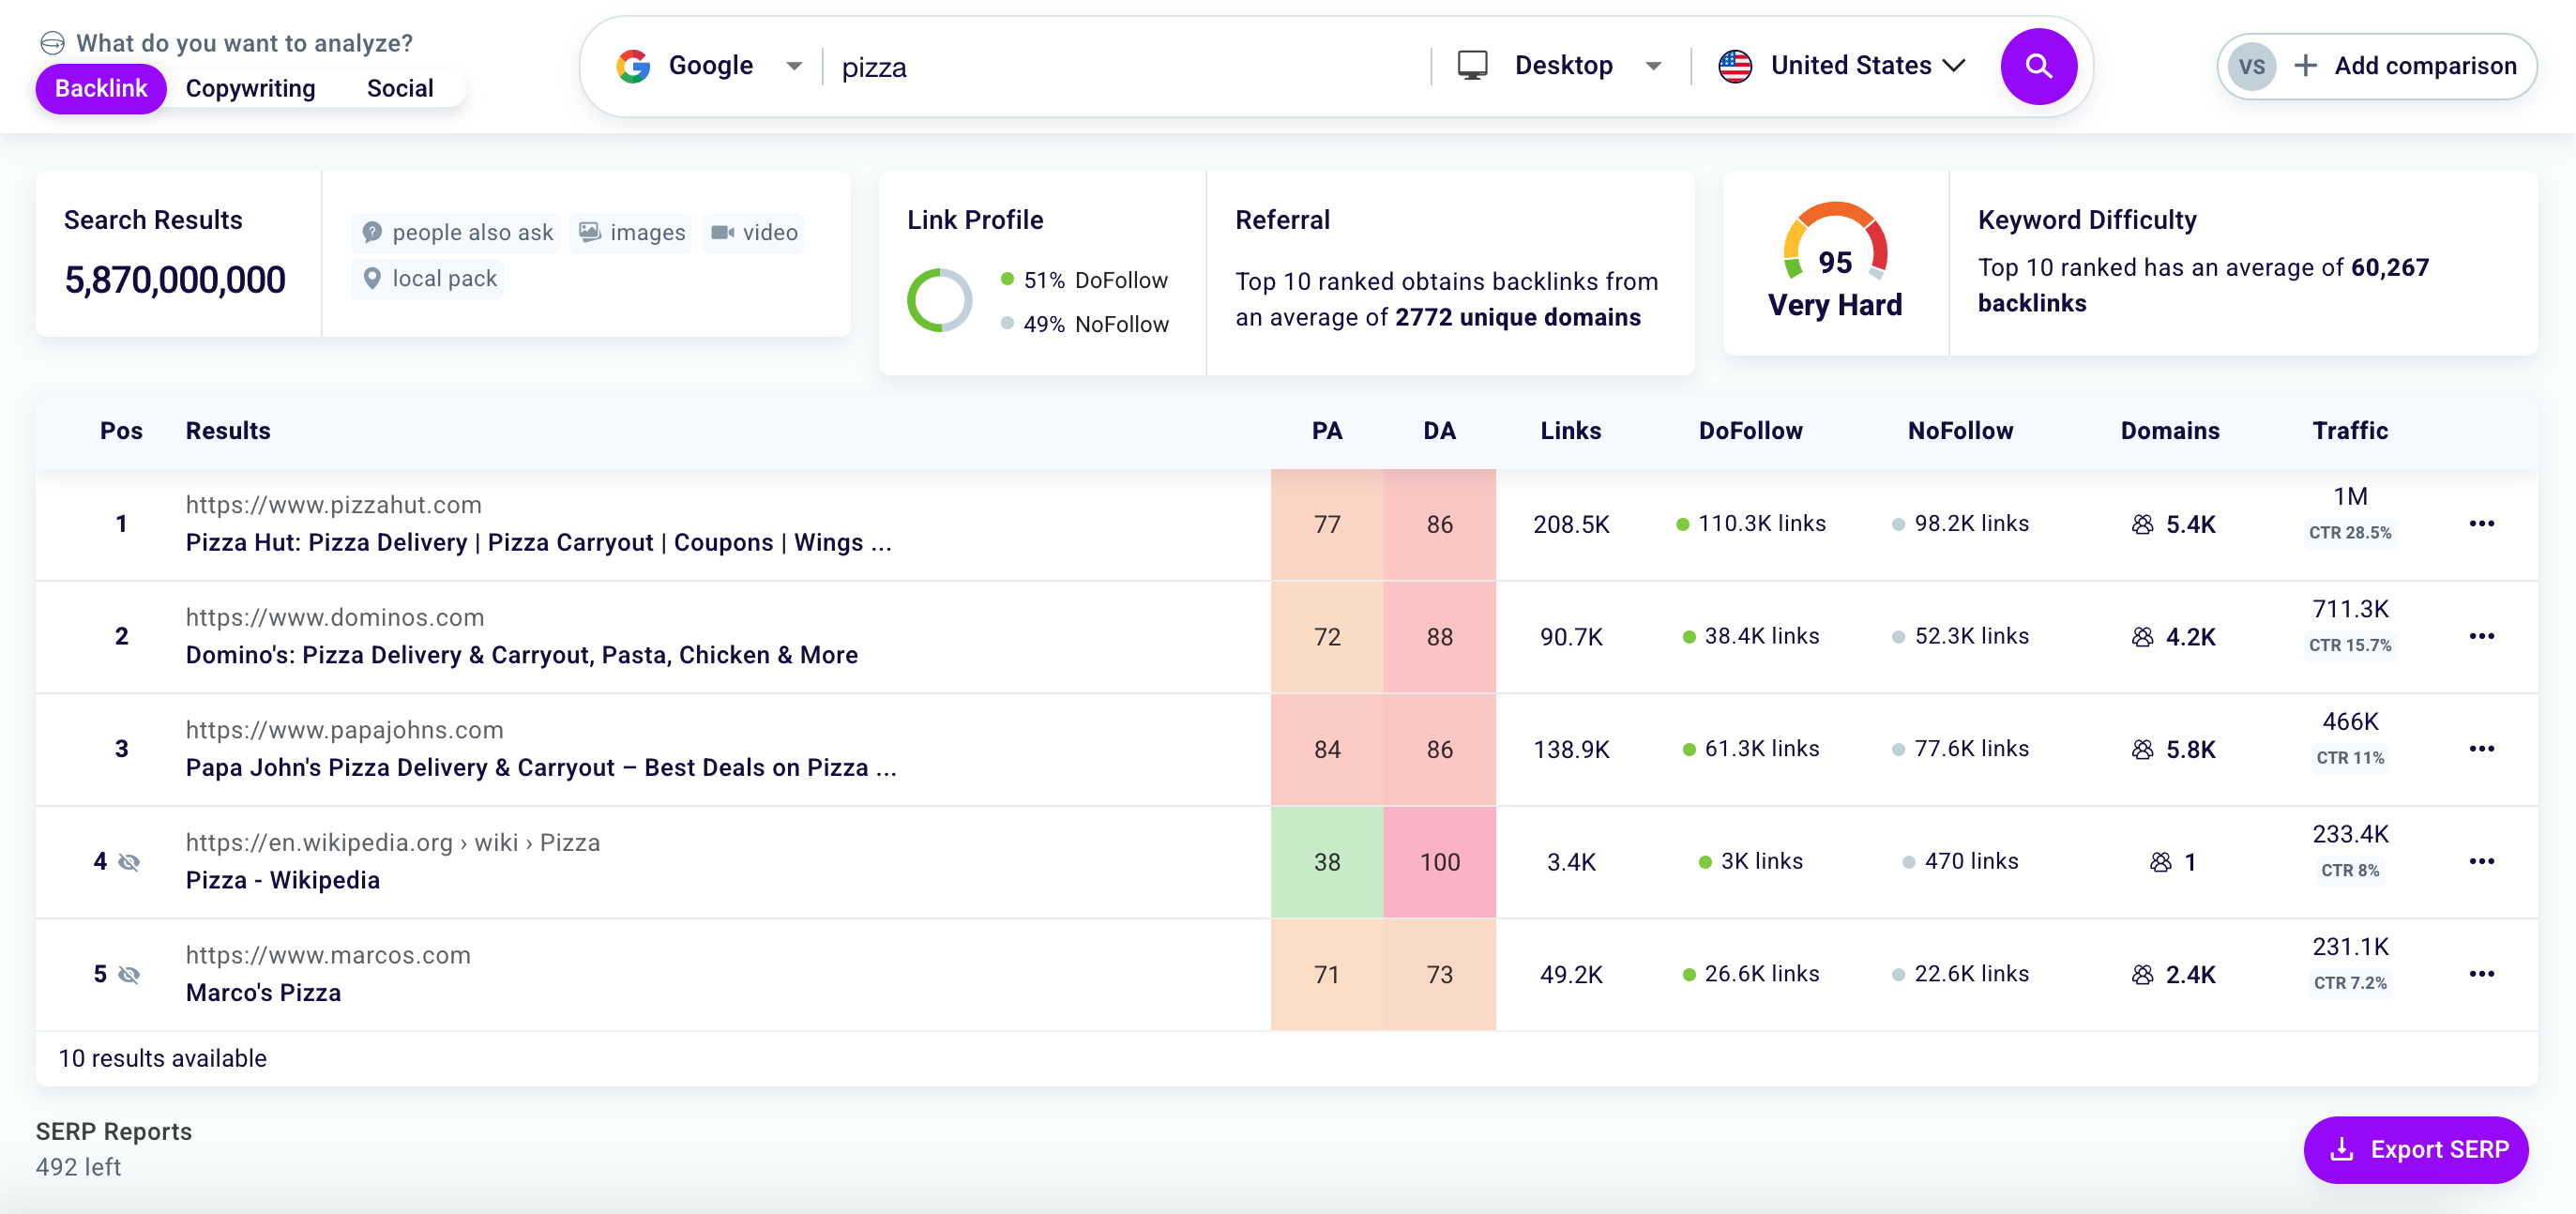
Difficulty
The first thing you’ll see is the difficulty of the chosen keyword. This number gives you an overall estimation of the chances you have to beat the competition and rank first on the SERP. In our case, the difficulty is very low. This means it is a promising search query to compete for. The difficulty is calculated out the data that appears on the tool’s SERP:
Page Authority (PA)
This number indicates how many quality inbound links the single page gets. The more links it has, the higher the Page Authority, the more reliable is the page.
If the authority is low and competing with that page will be easy, the SERP Checker will highlight it in green. Otherwise, the tool will highlight it in red.
Domain Authority (DA)
It works like the Page Authority, but on the entire website’s scale.
Links and CTR
The first is the number of inbound links to that page on other websites. The second is the percentage of people that actually click on those links. If this number is low, it can mean that people don’t find it interesting or useful to click on that link, and it is something that can hurt the ranking.
How to interpret the copywriting section of SERP Checker 360°?
Here you’ll see how your competition is doing in the content creator’s department. It’s like using Copy Metrics on steroids because you’ll be able to check in a glance all the metrics you’ll get with this tool, but for all your competitors for the same keyword.
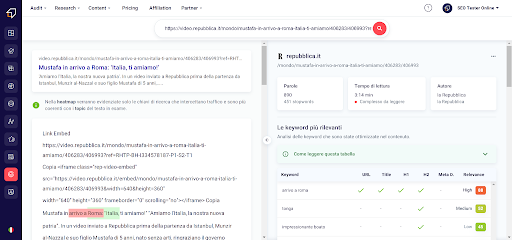
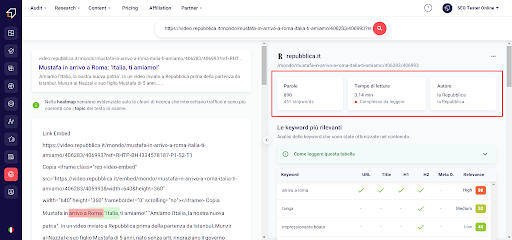
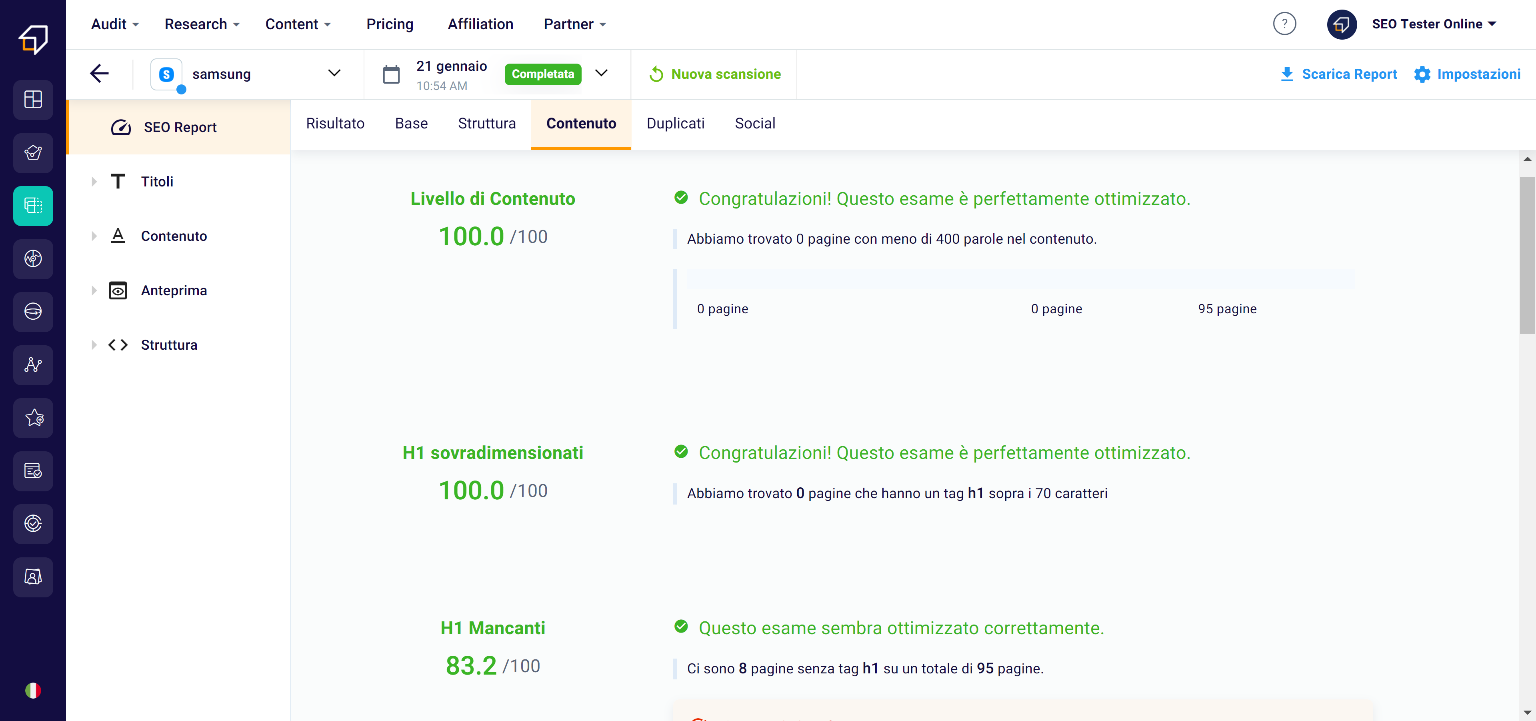
Text metrics
The first thing you’ll see is the text metrics. How many words comprise the article, the reading time and reading ease, and the author’s info.
How are they relevant to SEO?
Words number
It is common knowledge that an SEO-oriented article must be more than 400-words long, so search engines don’t consider it spam. This because Google and the others aim to provide their users with useful content. And let’s be honest, it isn’t easy to deliver relevant information with so few words.
Reading time and ease
Useful content is one that is easy to read. So, while we should try to make our blog post long enough, we also must keep it not too long either. Nobody has the time – or the attention – to read long articles. Let alone long ones that are difficult to read.
Author
While authorship is not a ranking factor, Google considers it is a quality indicator.
In its quality guidelines, Google regards the absence of information about the content’s author as an indicator of low quality.
Since Big G emphasizes trustworthiness with the notion of YMYL and the E-A-T guidelines, an anonymous and unreliable writer does not bode well for the website she is writing on.
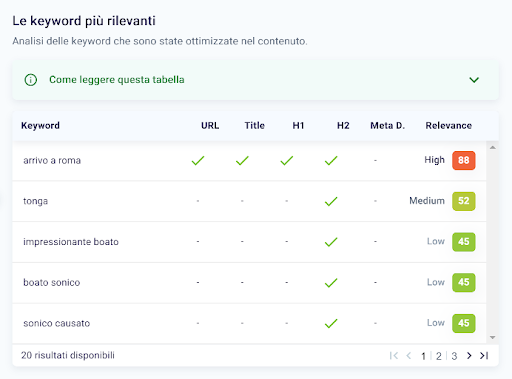
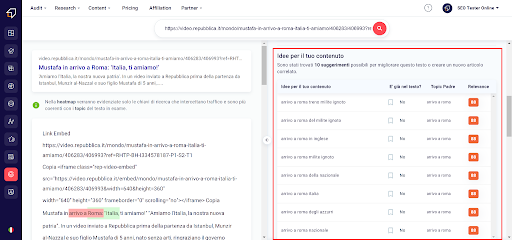
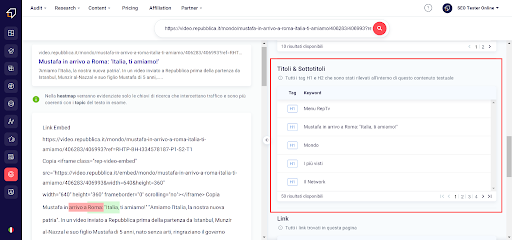
Most relevant Keywords
Right below the text stats, you’ll find the most relevant keyword table. It provides you with all the most pertinent keywords highlighted on the heatmap ordered on a list and sorted by relevance. It also shows you the distribution of each keyword through the various text elements. The more a keyword is present on URL, title, headings, and meta description, the more Copy Metrics will consider it as an essential topic of the blog post.
Headings
You’ll have an ordered list of the headings used in order of appearance on the headings table. If the article is well written, the table will give you an overview of the topic’s structure and sub-topics.
You can also see what keywords the author used and which ones are the most relevant to her.
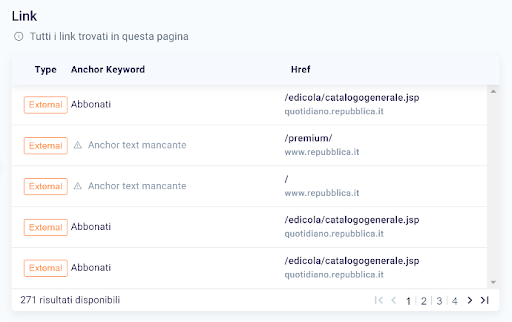
Links
Link building is one of the most critical activities in off-site SEO. To link your article to other parts of your website and other relevant and authoritative ones increases your content’s value. As a result, Google will reward it with a good ranking. You will have a complete list of internal and external links within the blog post in the Links table.
It is useful information when you use Copy Metrics to spy on the competition. You can use the table to see how many relevant links you should add to your blog post to make it more “linked” than your competitor’s.
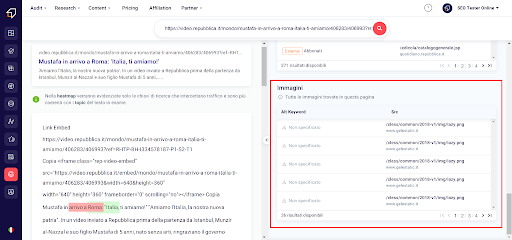
Images
Images are crucial in SEO; you should know that. They enrich your textual content, make navigation more pleasurable, and provide you with an extra clicking point on the SERP. Some people can land on your website from an image search, provided that your pictures feature an alt-text.
On the images table, you can see in a blink of an eye which images in the article have an alt-text and which have not. In this case, you’re lucky. No one here seems to use alt-text. Don’t you know what an alt-text is? Good news: we wrote a guide about how to optimize your images for SEO.
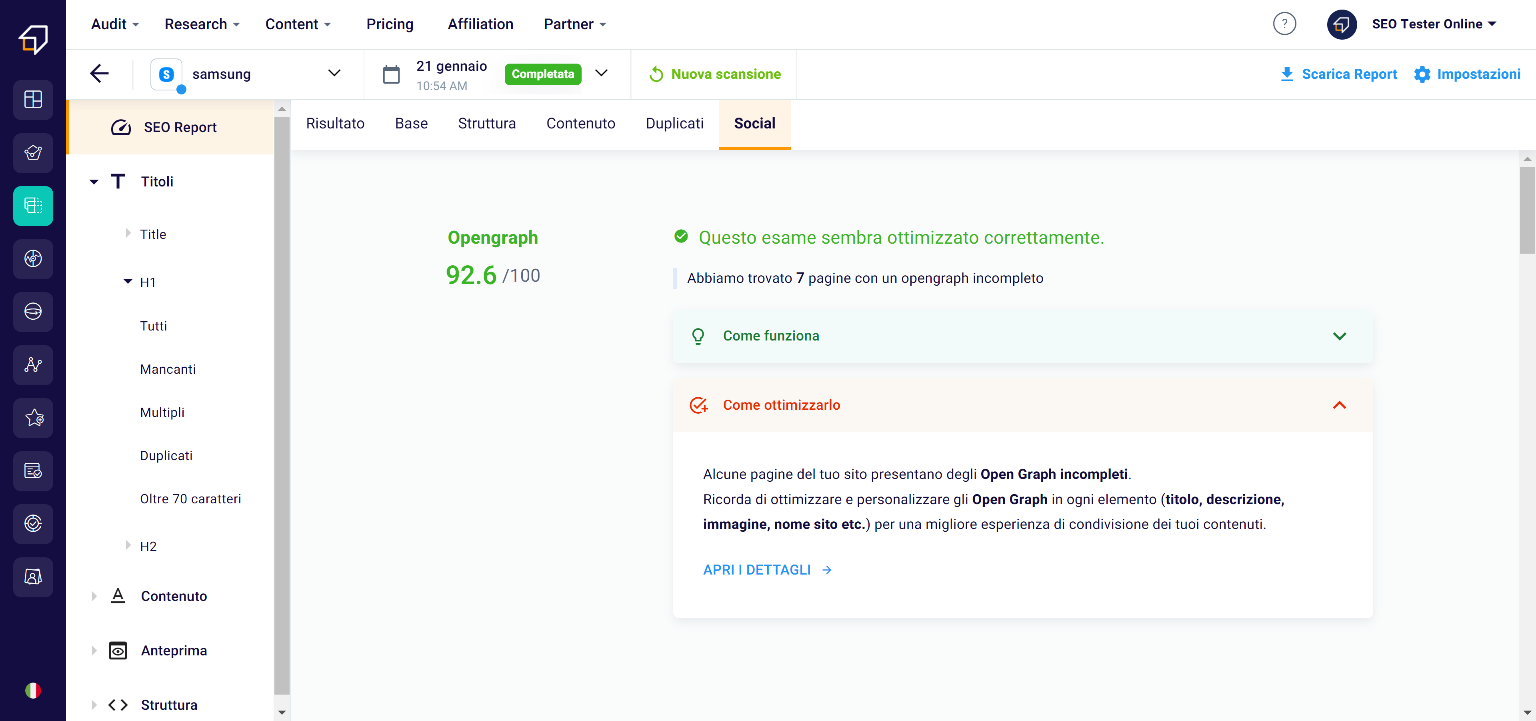
How to interpret the social section of SERP Checker 360°?
You can see how your competitors are doing on Social Networks on this screen.
As you should know, search engines like Google don’t consider social networks as a ranking factor. Nevertheless, they have an impact on SEO as they increase your content’s visibility.
The SERP Checker’s Social screen shows you all social signals (the number of shares, comments, and reactions) for each result within the SERP. These are all the factors that indicate how present is a page on social platforms and how the public perceives it.
Also the Social SERP checker shows you the social shares’ traffic.
We hope this knowledge base has been helpful to you. If you have any questions or concerns, please leave a comment or contact us at support@seotesteronline.com.